
Treatment Presenter settings
Settings is where you set up Treatment Presenter once for your whole practice, so your team isn’t re-toggling the same things on every patient. Per-patient changes always win — a coordinator can still adjust any plan in the Builder or chairside.
Where: Sidebar → Tx Presenter → the Settings gear (top-right of the dashboard). The left menu has five sections.
General
Section titled “General”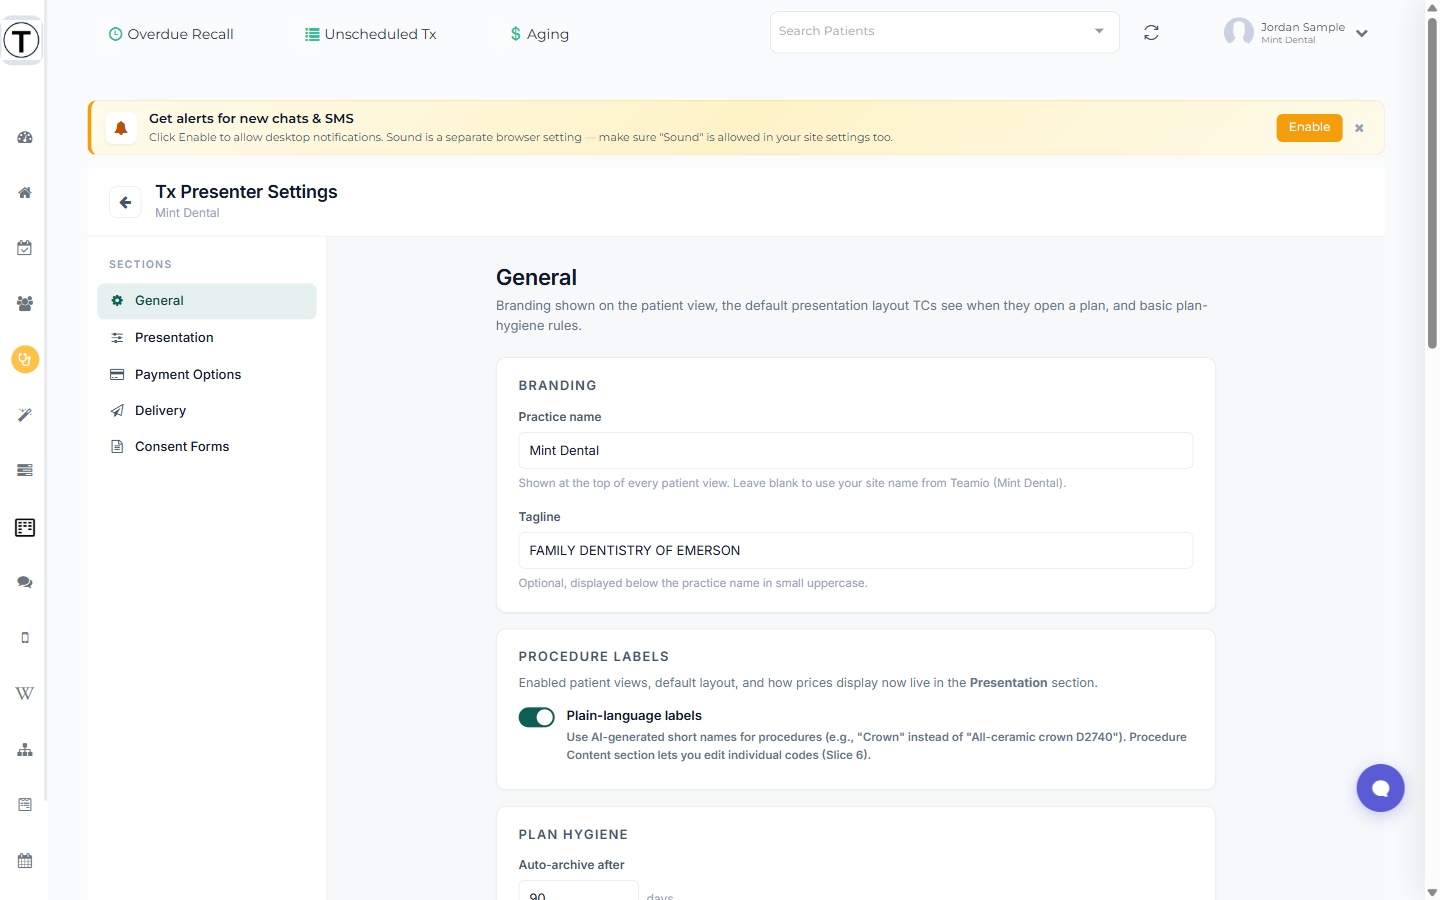
- Branding — your Practice name and an optional Tagline shown on the plan header.
- Procedure labels — how procedures are labeled for patients.
- Plan hygiene — Auto-archive plans after a period so the dashboard stays current.
- Open Dental imaging — the imaging category signed plans file into in Open Dental.
- Post-sign email to patient — the Subject and Body of the email a patient gets after signing.
- Patient guidance — Guide patients after signing (on by default): right after the patient signs, walk them through any unsigned consent forms and an optional payment step in a step-by-step popup. See Choosing an option & paying.
- AI replies on patient questions — choose Auto (replies send on their own) or Review (you approve each draft first). See Answering patient questions.
- Patient comment notifications — the email addresses to notify when a patient asks a question.
Presentation — your house style
Section titled “Presentation — your house style”This section sets how plans look by default. New plans start here; coordinators can still change any of it per patient.
- Patient views — which views patients can see (Arch & Region, Itemized) and which opens first.
- Pricing display — which views show prices by default, and which fee lines appear (Net fee, Standard/UCR, Insurance estimate, Show Procedure Discounts).
- Itemized layout — turn on Group by priority by default, choose the group word (Priority / Visit / Phase / your own), and whether to show per-group subtotals.
- Procedures — whether exams & X-rays show by default.
Payment Options
Section titled “Payment Options”- Patient call-to-action — the button text the patient taps to choose an option. The default is “I’m interested”; change it to your wording (e.g. “Choose this option”).
- Options — your practice’s payment plans (Pay in full, Half & Half, in-house, financing, etc.). Set discounts, splits, and terms. Financing options open a menu of terms — see Setting up financing options.
Delivery
Section titled “Delivery”The messages that carry the plan link to the patient:
- SMS — the message body for texted plans (supports placeholders like
{patientFirstName},{practiceName},{planLink}). - Email — the Subject and Body for emailed plans.
Consent Forms
Section titled “Consent Forms”Map procedure codes to the consent forms patients should fill out, so you can bundle them when sending a plan.
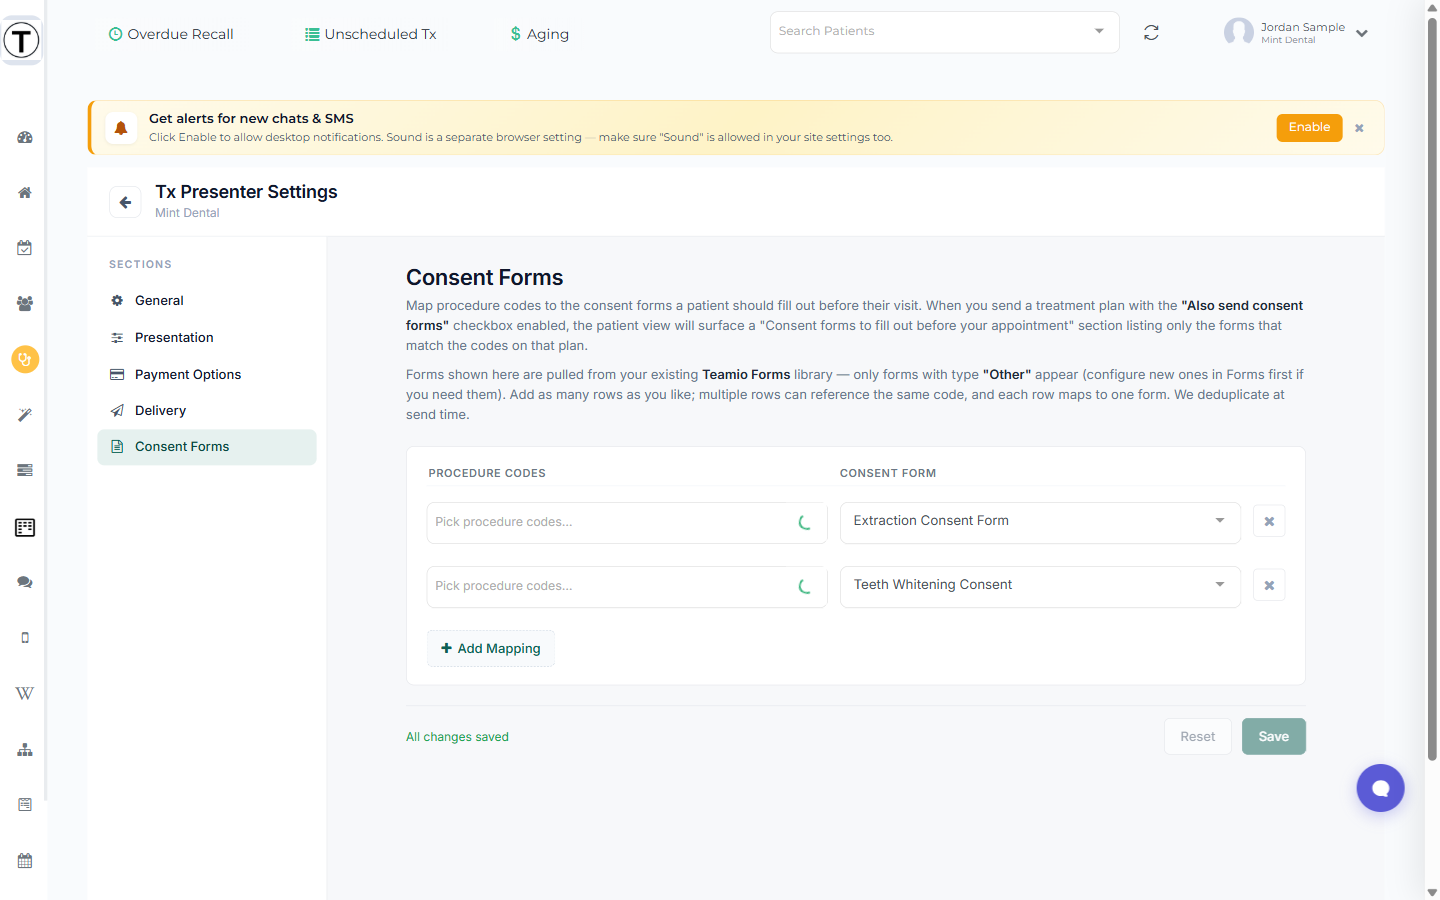
- Click + Add Mapping.
- In Codes, search and multi-select the procedure codes covered by this form (e.g. both
D2740andD2750). - In Form, pick the Teamio form to send for those codes. The list shows your forms of type Other.
- Add a row per consent form, then Save.
Good to know: one row = one form; if a code needs two forms, add it to two rows. If a form you expect isn’t listed, check it’s saved in Forms and not marked a template.
The same mapping also works outside Treatment Presenter. It drives the consent list on a patient’s appointment in Forms, and it can be edited from there too — the Forms page has the same screen behind the link icon. Practices that don’t use Treatment Presenter still get the benefit. See Mapping procedures to consent forms.
Enabling Treatment Presenter for your practice
Section titled “Enabling Treatment Presenter for your practice”Treatment Presenter is turned on per practice — contact Teamio support to enable it. Once on, the Tx Presenter sidebar entry and the Tx Plans button on the patient profile appear for everyone at the practice (it isn’t restricted by role).