
Working the Overdue Recall list
Where: Top navigation bar → Overdue Recall
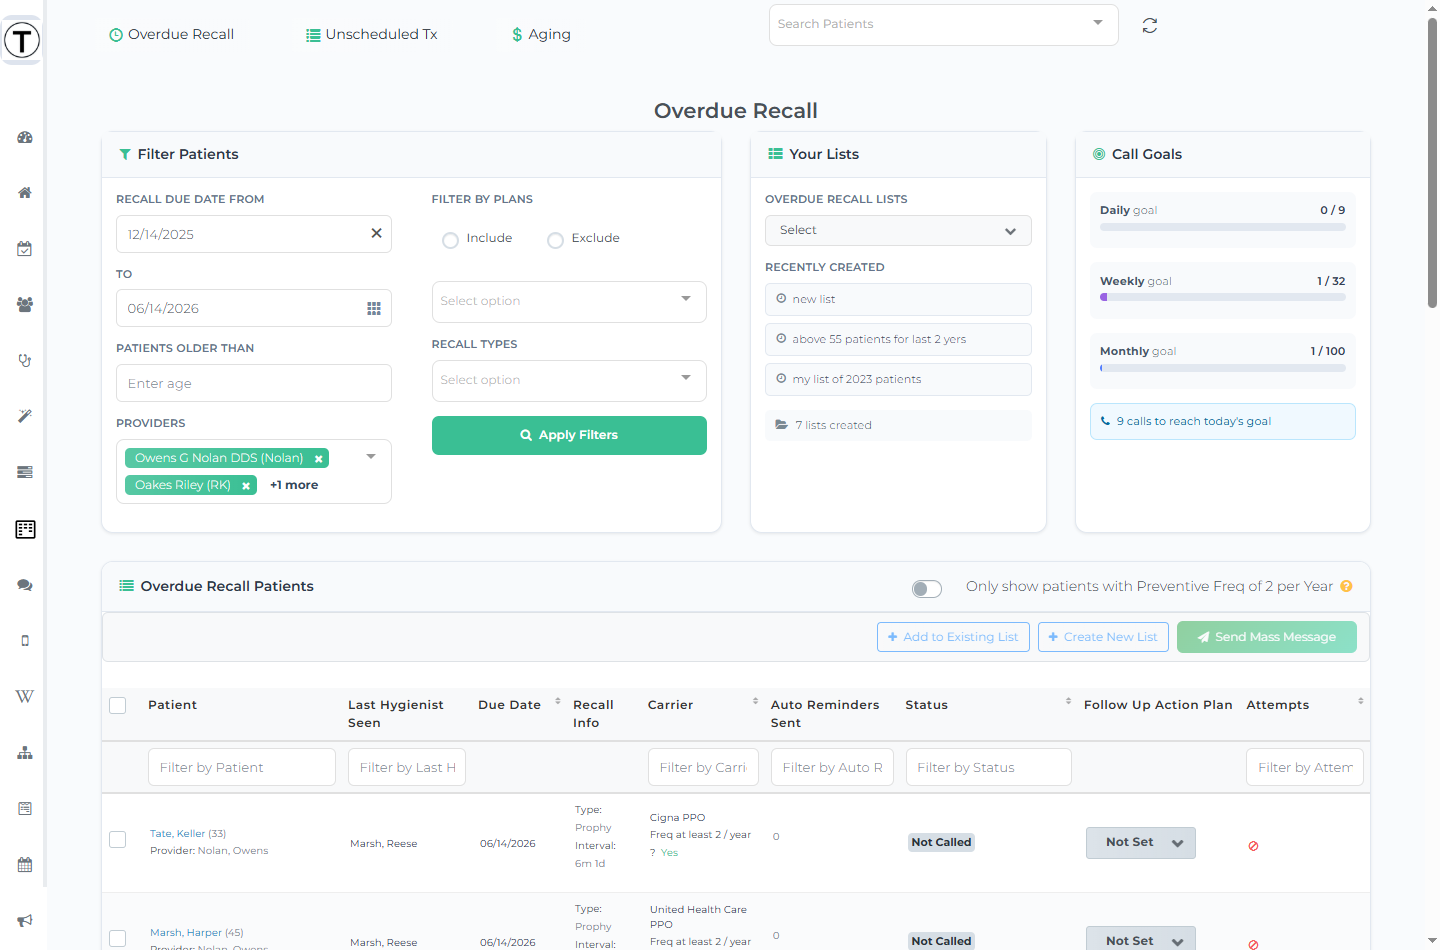
The page opens with the patients overdue for recall in the last six months and three panels across the top:
- Filter Patients — narrow the list to who’s worth calling today.
- Your Lists — your saved recall lists and quick links to recent ones.
- Call Goals — daily, weekly, and monthly progress bars against the goals set in follow-up settings.
Building your working list
Section titled “Building your working list”Use the Filter Patients panel, then select Apply Filters. The filters are:
- Recall Due Date From / To — the due-date window (a span of up to 24 months is enforced).
- Patients Older Than — minimum patient age.
- Providers — a multiselect; your office’s default providers are pre-selected from settings.
- Filter by Plans — an Include / Exclude choice plus a carrier multiselect. Type
abc*to bulk-select every carrier starting with “abc”. - Recall Types — a multiselect of recall categories (prophy, perio, etc.).
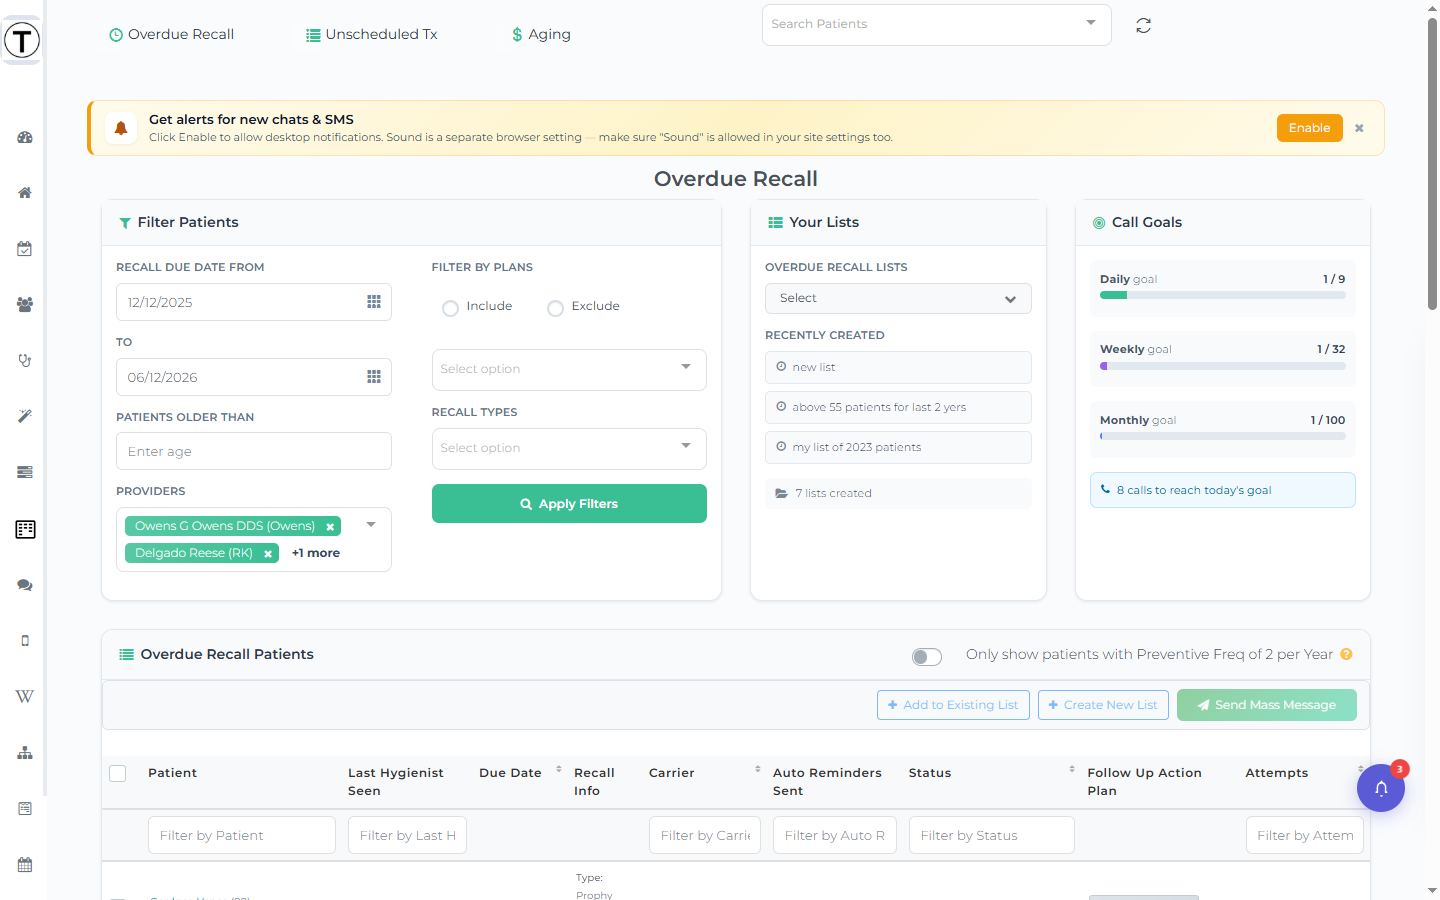
Above the table, the Only show patients with Preventive Freq of 2 per Year toggle limits the list to patients whose insurance allows two cleanings a year (select the ? for details; uninsured patients always appear). Aim for a list worth calling today — 50 focused patients beat 800 overwhelming ones. Right next to that toggle is a small bar-chart icon that opens the Recall Reminder Text Report — every automated recall reminder your practice has sent, for any date range.
Reading the table
Section titled “Reading the table”Each row is one overdue patient. The columns:
| Column | What it shows |
|---|---|
| Checkbox | Select patients for a bulk action (see below). |
| Patient | Name (a link to the profile), age, and provider/hygienist. |
| Last Hygienist Seen | Who the patient last saw for hygiene. |
| Due Date | When recall came due. |
| Recall Info | Recall type and interval. |
| Carrier | Insurance carrier, with the “Freq at least 2 / year” indicator. |
| Auto Reminders Sent | Appears only if you pay for Appointment Reminders — automated reminders already sent. |
| Status | The follow-up status badge from the last attempt. |
| Follow up Action Plan | The patient’s next follow-up date, and the controls to change or stop it. |
| Attempts | Phone / envelope / mobile icons for each logged attempt, with a “+N” overflow and hover tooltips. |
Each column header has its own filter box, so you can filter the loaded list by patient, carrier, status, and so on without re-running the main filters.
Working a row
Section titled “Working a row”Select the patient’s name to open the follow-up panel — a slide-out with the patient’s contact info and the Phone Followup / SMS Followup / Email Followup actions. Make your attempt, pick a Follow-up Status, jot a Follow-up Note, and the next follow-up date sets itself from your office settings. See Follow-ups — what to do on every list for the full panel walkthrough.
To text from this page, open the patient’s panel and use SMS Followup — there is no Text button on the row itself. To reach several patients at once, check them, save them as a list, and send to that list as a campaign. See texting patients from a list.
AI Call (the robot button on a row) is currently in limited rollout — contact Teamio to enable it for your practice. It places a call simulation that needs the patient’s mobile number and “Text OK” on file.
Saving the list
Section titled “Saving the list”Tick the checkboxes on the patients you want to keep working, then choose Create New List (name it) or Add to Existing List. A saved list stores a snapshot of those patients with Follow-up Attempts and Outcome charts so the team can work the same group over several days. See saved lists for the full flow.
There’s no per-list assignee or per-list goal — accountability and call goals are office-wide per list type, set in follow-up settings. Your saved recall lists are also reusable as campaign audiences — one good list, two uses.