
Emailing a patient from their profile
Open a patient’s profile and select Email to write them an email — from scratch, or starting from any of your text or email templates.
Write an email
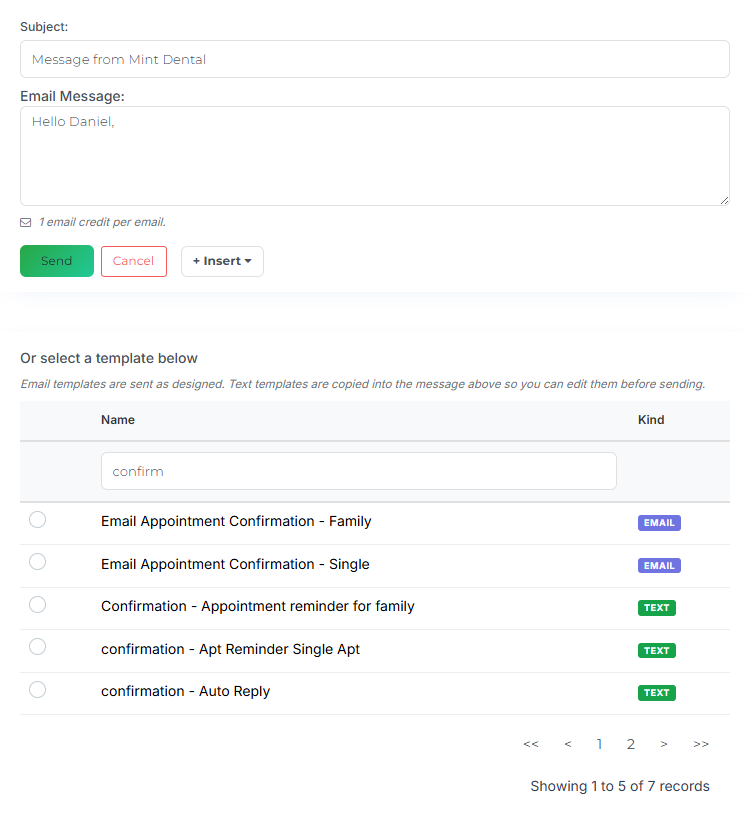
Section titled “Write an email”- On the patient’s profile, select Email. The panel opens on the right with the Subject filled in as Message from your practice’s name, and the message started with Hello and the patient’s first name.
- Change the subject if you like, and type your message. Press Enter for a new line — the patient sees your line breaks exactly as you typed them.
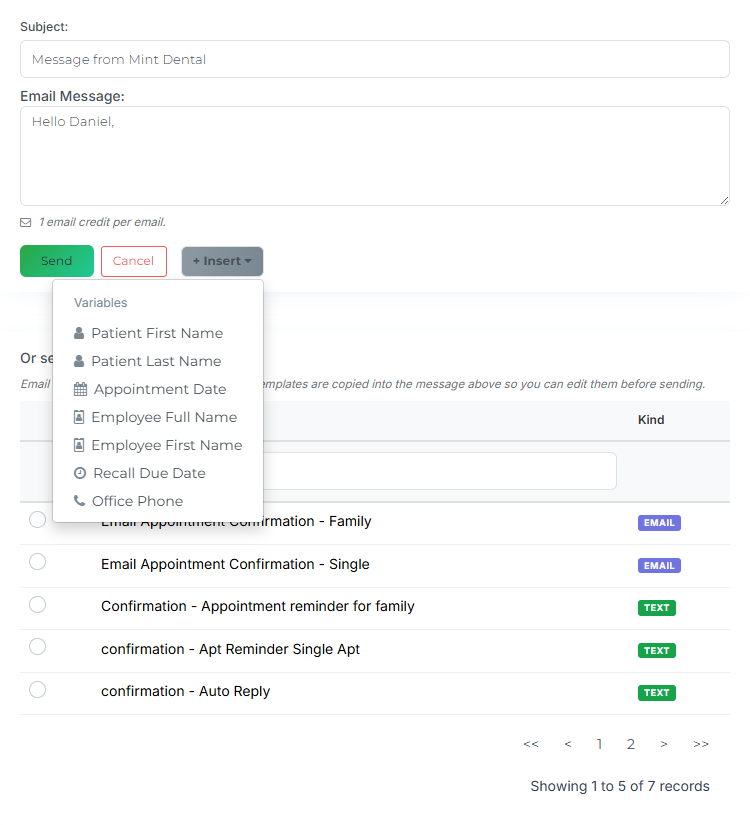
- To personalize it, select + Insert and choose a variable. It’s placed where your cursor is.
- Select Send. You’ll see Email queued. It will be sent to the patient shortly.
The variables you can insert
Section titled “The variables you can insert”| Variable | What the patient sees |
|---|---|
| Patient First Name, Patient Last Name | The patient’s name from Open Dental |
| Appointment Date | The date and time of their next scheduled appointment |
| Employee Full Name, Employee First Name | Your name, as the person sending |
| Recall Due Date | When their recall is due |
| Office Phone | Your practice’s phone number |
If a variable has nothing to fill in — say the patient has no upcoming appointment — it’s simply left out of the email, so the patient never sees curly braces.
Start from a template
Section titled “Start from a template”Under Or select a template below you’ll find all of your templates, each with a Kind badge. Use the Filter by Name box to find one quickly.
- TEXT — one of your text-message templates. Selecting it copies the wording into the message box so you can edit it before sending. A form link in the template shows as [Form: form name] and becomes a clickable link for this patient when the email goes out. Leave the variables in curly braces as they are — you can delete one, but don’t rename it.
- EMAIL — a designed email template from your Wiki. It’s sent exactly as designed, with its own subject line. The message box is replaced by a note naming the template; select Write my own message instead to go back to writing.
Select Clear template to empty the message box and start over.
![A TEXT template copied into the message box, with a [Form: root canal consent form] item and the green note explaining that form items become clickable links for this patient.](/images/ui/outreach-emailing-a-patient-text-template.png)
What the patient receives
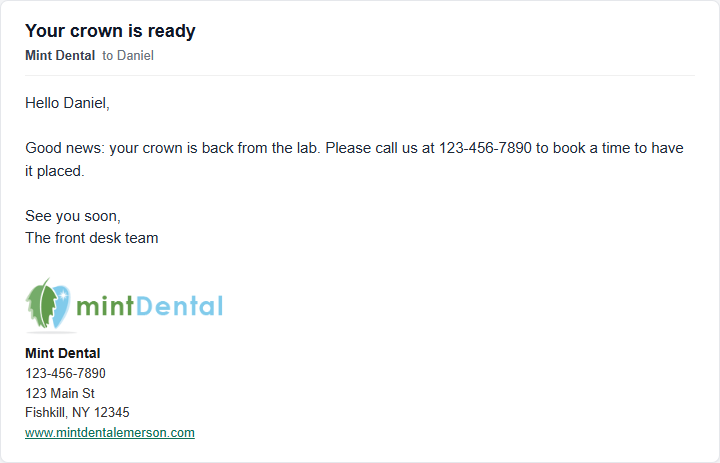
Section titled “What the patient receives”- It’s from your practice. The email comes from your practice’s own email address with your practice’s name as the sender — the same address your appointment reminders use.
- Your signature. If your practice’s email signature is switched on, it’s added below your message.
- Plain, readable text. Your line breaks are kept. Formatting you type yourself, like
<b>, shows exactly as typed — for bold text, images, or colors, use a designed EMAIL template. - A record in Open Dental. A note — [Teamio] Email Sent: followed by the subject — is added to the patient’s communication log in Open Dental.
Tips & common questions
Section titled “Tips & common questions”- “Your practice is out of email credits.” Send is disabled until credits are added. Add credits from the balance in the header, then try again.
- “This message uses a variable we cannot fill in.” You typed a variable Teamio doesn’t recognize, such as
{{first_name}}. Pick one from + Insert instead, or delete it. - A blank message, or one that’s only the greeting, isn’t sent. Write your message first.
- Patients who prefer another language. Text templates are emailed in English. When a patient’s preferred language isn’t English, a reminder appears under the message box so you can adjust the wording before you send.
- Sending forms? Use the Form button instead — each form arrives as a clickable link. See Sharing a form with a patient.