
Attaching Photos to a Treatment Plan
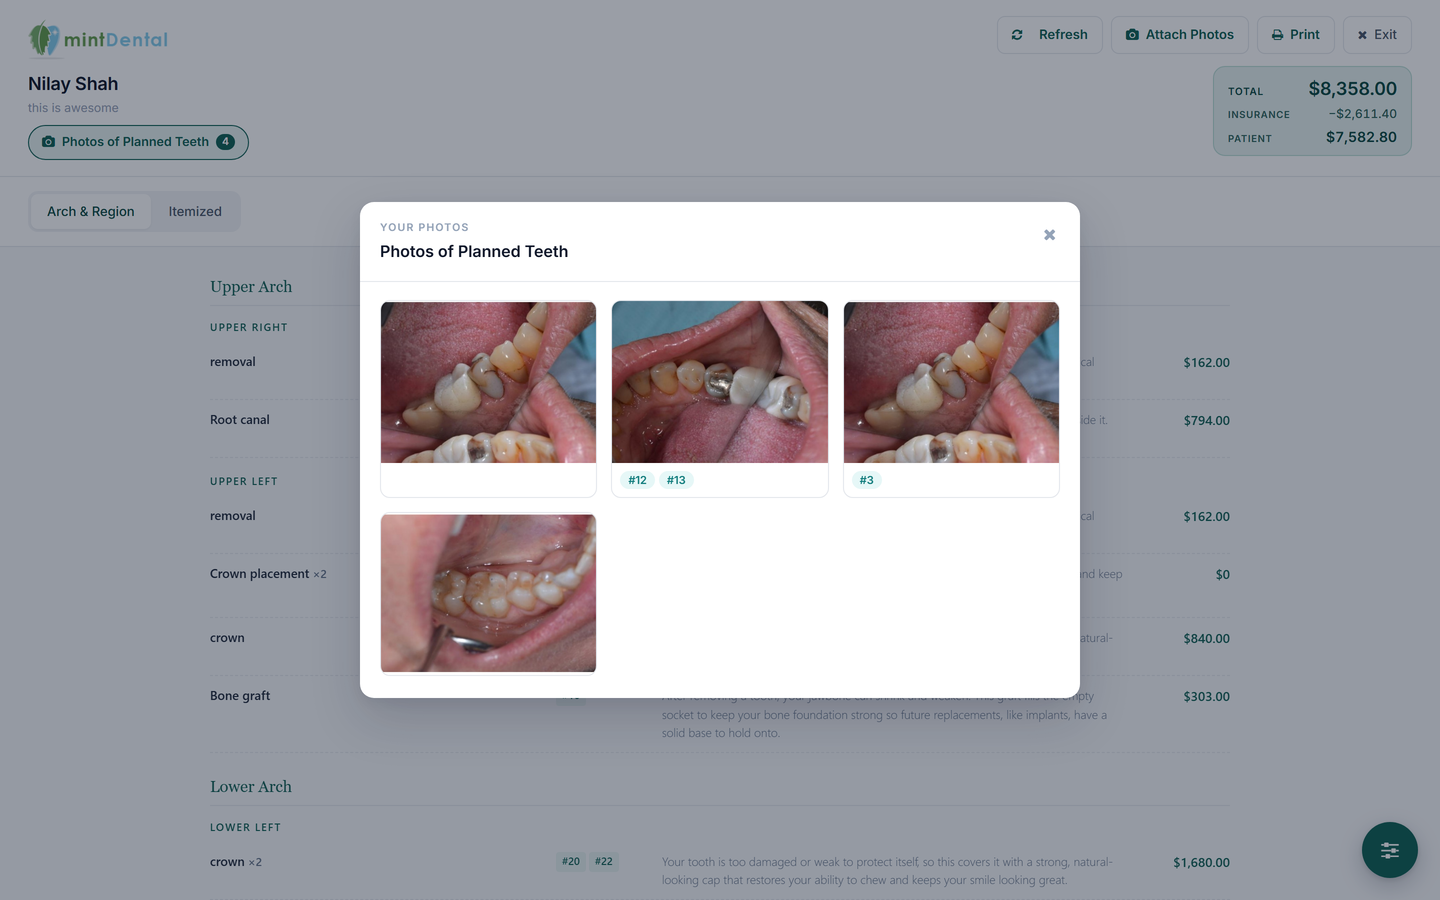
“Crown #12” is obvious to your team. To the patient it’s a line item with a price on it. Attach the photos you took during the exam and they can see the tooth you’re talking about — a small camera appears next to that tooth on the plan, and a Photos of Planned Teeth button opens the whole set.
Where: the Attach Photos button — next to Comments in the Builder, or next to Refresh in Present Mode. Both open the same window.
Upload photos
Section titled “Upload photos”- Open the patient’s plan in the Builder, or start presenting it.
- Click Attach Photos.
- Drag photos onto the box, or click browse and pick them. You can select several at once.
- Each photo uploads and appears in the list below. That’s it — it’s saved.
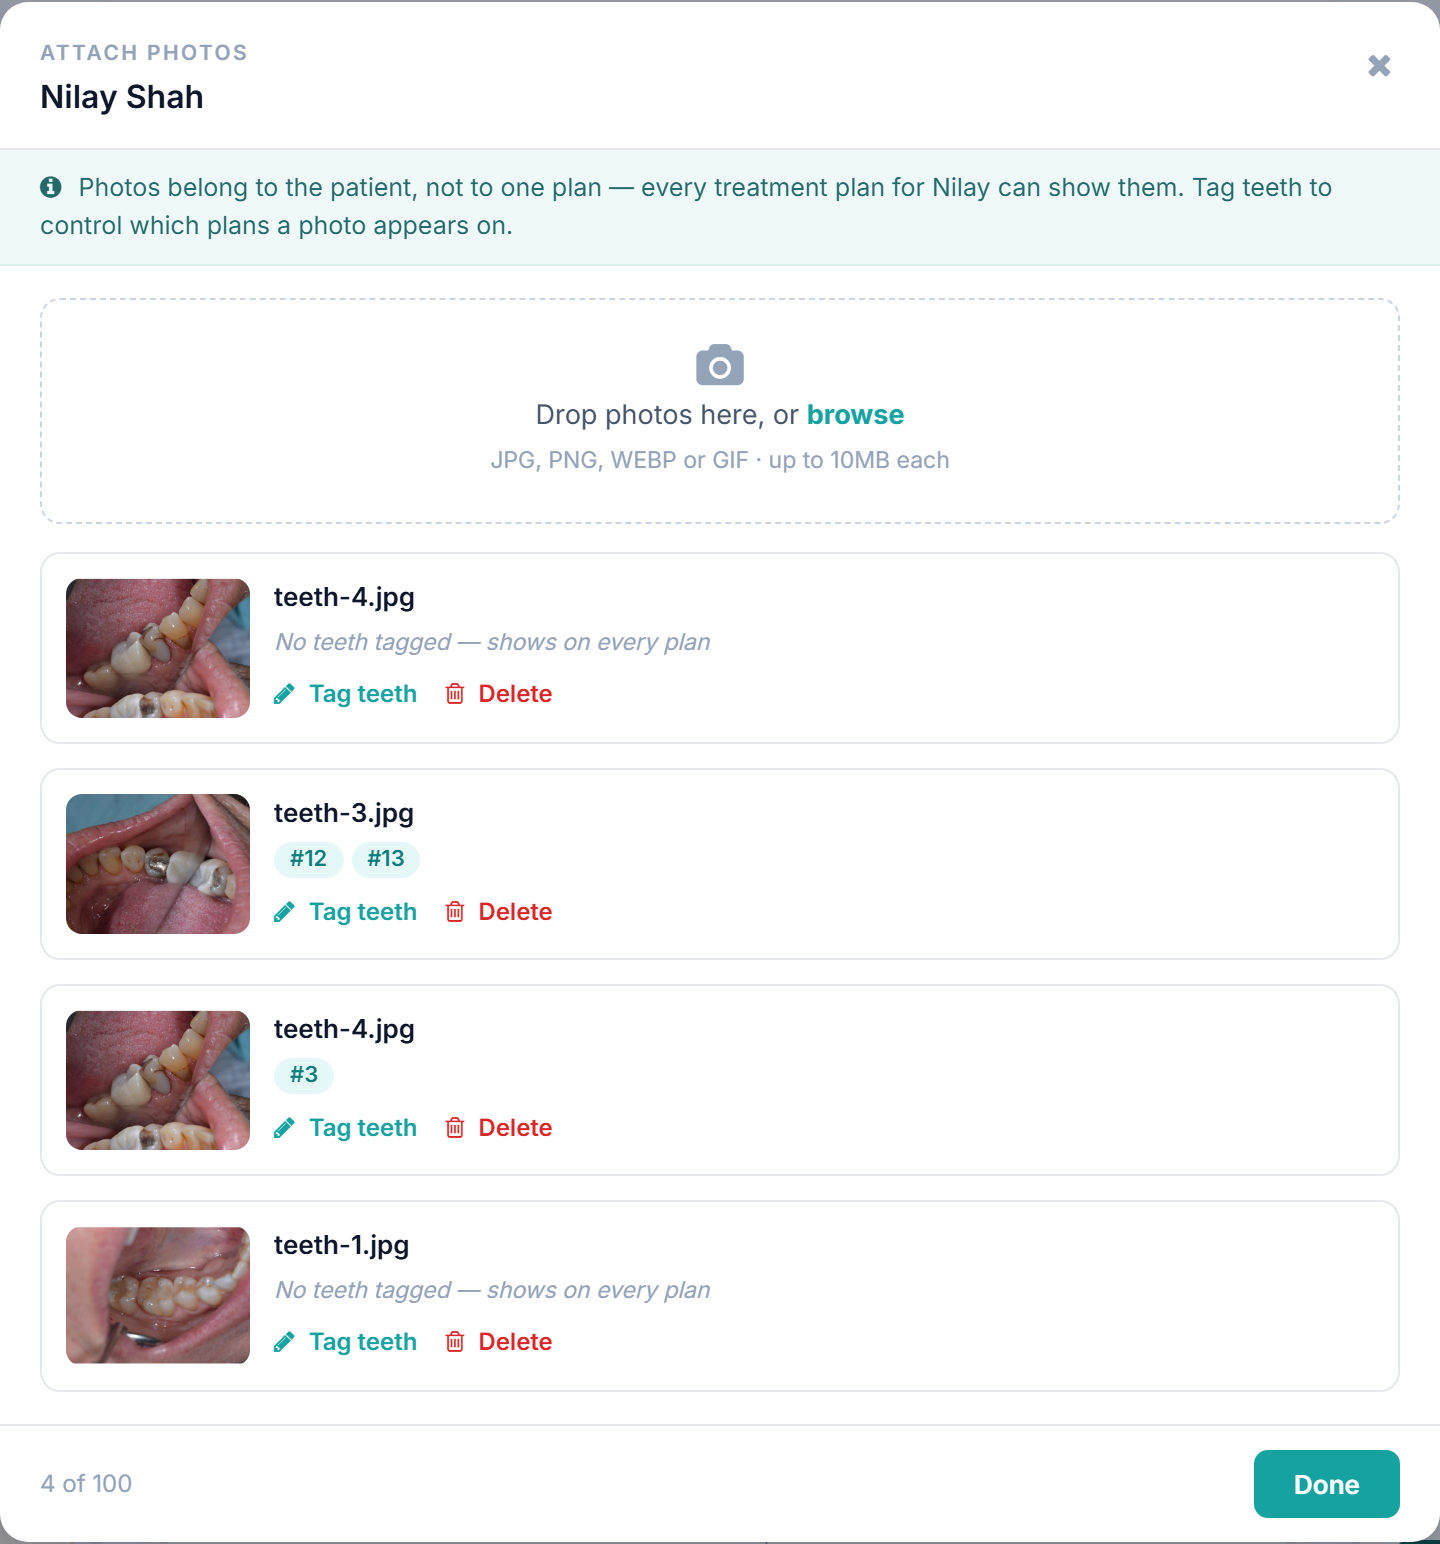
- JPG, PNG, WEBP or GIF, up to 10MB each.
- Large photos are shrunk automatically before uploading, so a full-size camera photo is fine.
- Up to 100 photos per patient.
Tag the teeth a photo shows
Section titled “Tag the teeth a photo shows”Tagging is optional, but it’s what makes the camera icons appear next to the right teeth.
- Click Tag teeth under a photo.
- Tap the tooth numbers the photo shows. Selected teeth fill in.
- There’s no save button — each tap saves as you go.
- Click Done to collapse the tooth picker.
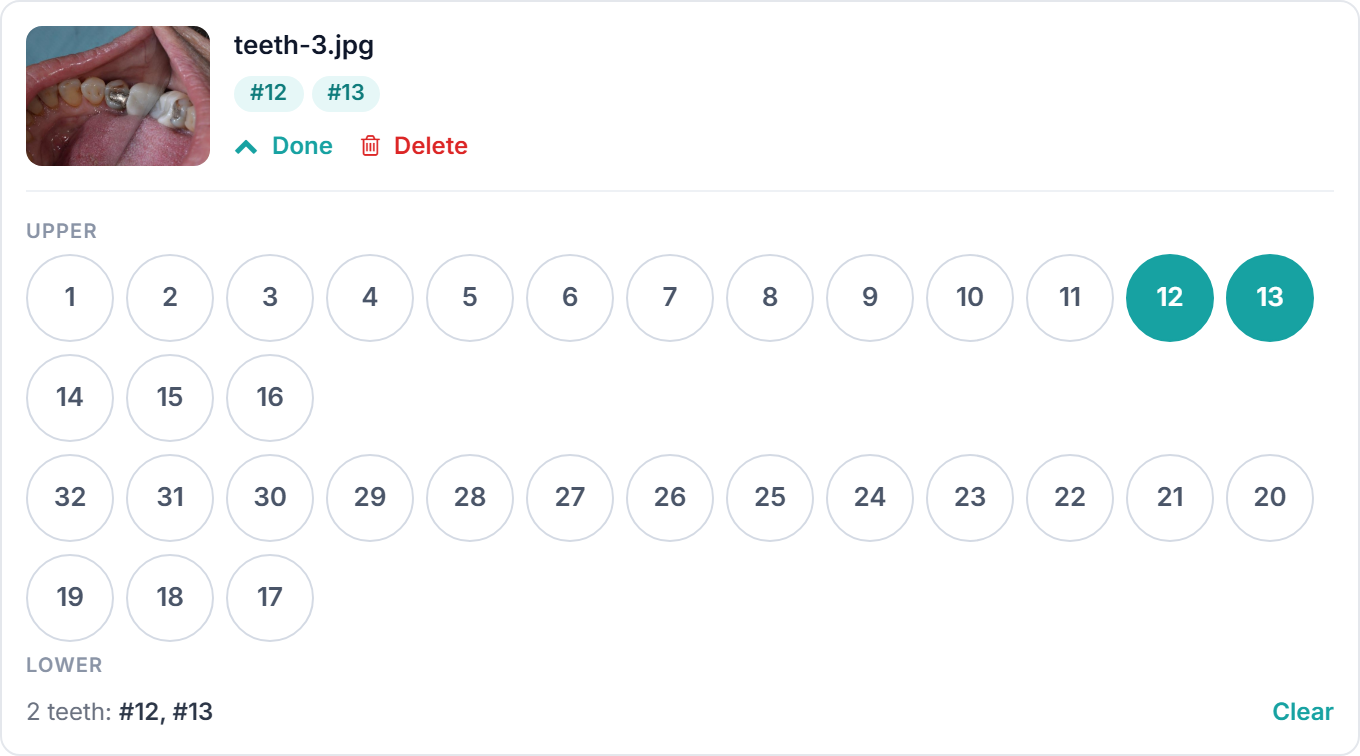
The upper arch runs 1–16 and the lower arch runs 32–17, so the numbers sit in the same order as the mouth you’re looking at. Clear removes all the tags from that photo at once.
Which photos appear on which plan
Section titled “Which photos appear on which plan”| If a photo is… | …it shows on |
|---|---|
| tagged with a tooth that’s on this plan | this plan |
| tagged only with teeth that aren’t on this plan | not here — but it still shows on a plan that treats those teeth |
| not tagged at all | every plan — treat it as a general photo |
So a photo tagged #2 and #5 appears on any plan that treats #2 or #5. A photo you never tagged appears everywhere.
Turn photos on or off for a plan
Section titled “Turn photos on or off for a plan”Show Photos in Tx Plan controls whether this plan shows photos at all. It’s on by default, and it’s the same switch in three places — change it anywhere and it changes everywhere:
- the Builder’s right panel
- Present Mode’s TC Controls tray
- the Send window, where it reads Include photos with this plan

Underneath the switch you’ll see something like “3 of 7 photos apply to this plan” — the first number is what the patient will actually see, the second is the whole library.
To change the default for every new plan, go to Tx Presenter settings → Presentation → Photos and set Show attached photos in the treatment plan.
What the patient sees
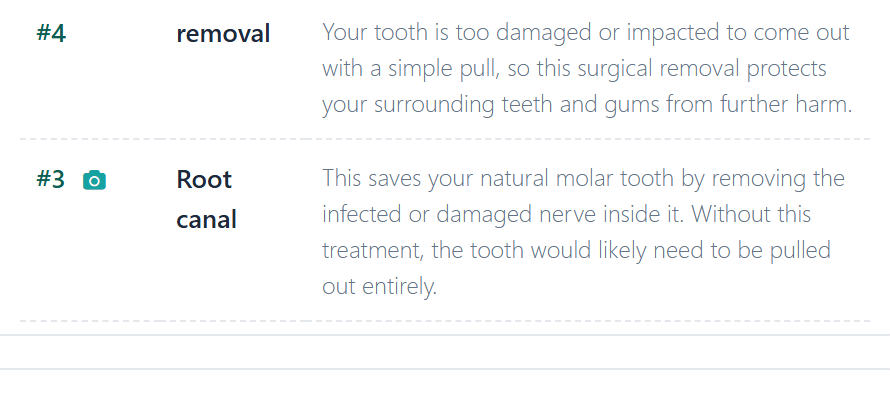
Section titled “What the patient sees”In the Itemized view, a small camera sits next to the tooth number:
In the By Region view, the whole tooth pill is the button, with the camera inside it:
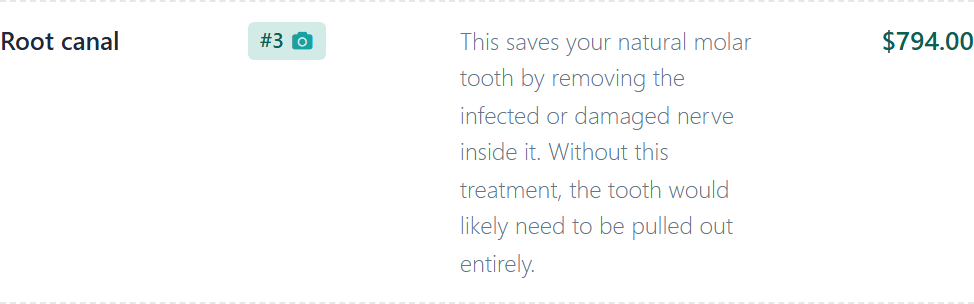
Tapping either one opens the photo full screen. Use the on-screen arrows or the left/right arrow keys to move between photos, and Esc to close.
The Photos of Planned Teeth button opens the whole set for that plan. Chairside it sits under the patient’s name in Present Mode; on the patient’s own link it sits to the left of Conversation with your office.
Check before you send
Section titled “Check before you send”- Click Send.
- Under the patient link, find Include photos with this plan.
- A Will include: strip shows every photo the patient will get, with its teeth underneath — or All plans for an untagged one.
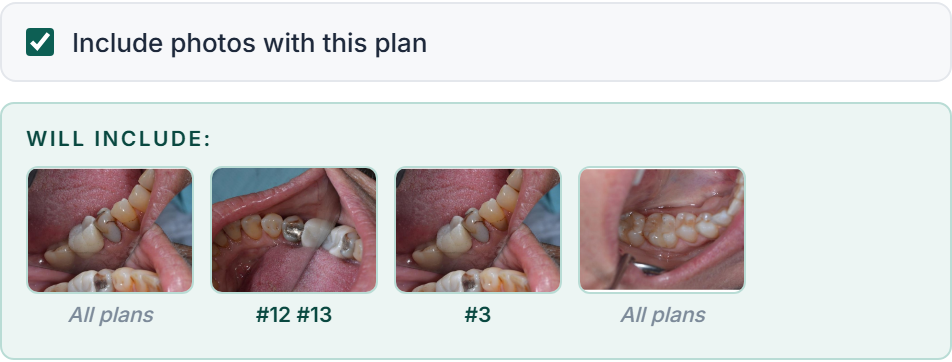
If the patient has photos but none of them are tagged with a tooth on this plan, the window tells you so and no photos go out.
Good to know
Section titled “Good to know”- Deleting removes the photo from every plan, because the library is shared. There’s no per-plan delete — untag the teeth, or turn the switch off for that plan instead.
- Delete asks twice: the first click changes the button to Tap again to delete.
- An untagged photo gets no camera icon next to any tooth — it isn’t about one particular tooth — but it still appears in the gallery and in the Send preview.
- If your iPad offers a HEIC photo and it’s rejected, take or export it as JPG. Choosing the photo through the normal picker usually converts it for you.
Related
Section titled “Related”- Building a treatment plan
- Presenting a plan chairside
- Sending a plan to the patient
- Treatment Presenter settings — the practice-wide default