
Team chat
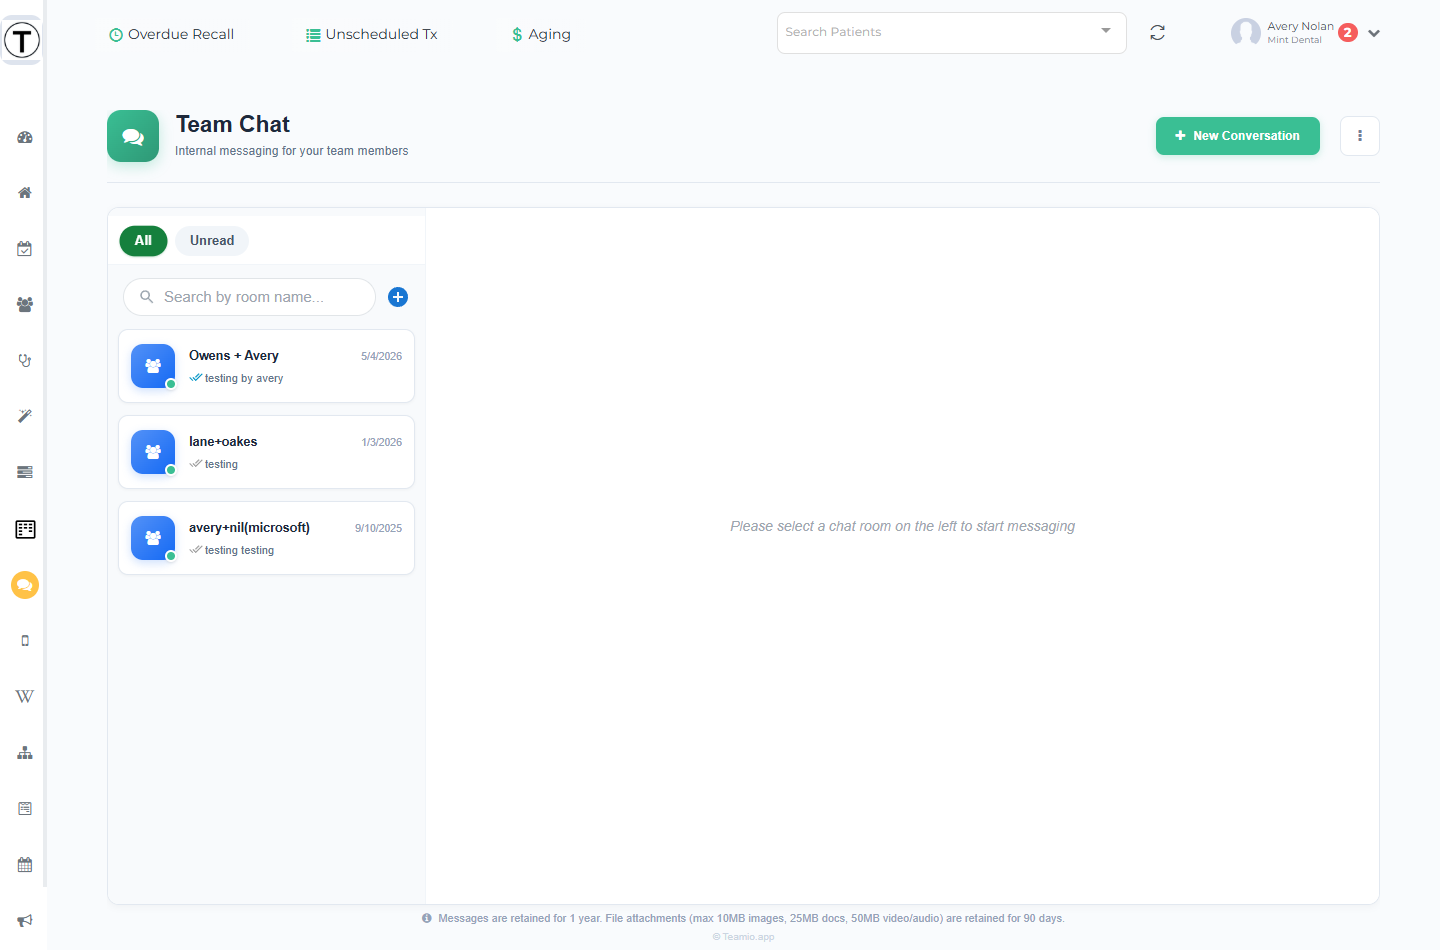
Team Chat is messaging for your team only — nothing here ever reaches a patient’s phone. That separation is the whole point: coordinate, ask a quick question, and discuss patients freely without the “wrong box” risk of using one tool for both. Open it from the speech-bubble icon in the left rail (tooltip Chat). The page heading reads Team Chat with the subtitle Internal messaging for your team members.
The layout
Section titled “The layout”- Header — a New Conversation button and a ⋮ (three-dot) menu at the top right. The ⋮ menu holds Settings and (for admins) Export All Team Chats.
- Rooms list — a Search by room name… box with a blue + beside it, plus All and Unread filter chips (the Unread chip carries a count). Selecting Unread when nothing is unread shows an All caught up! empty state.
- Open room — messages on the right, with a composer at the bottom and a ⋮ menu on the room header for room management.
Start a conversation (create a room)
Section titled “Start a conversation (create a room)”There’s one flow for both group chats and one-on-ones:
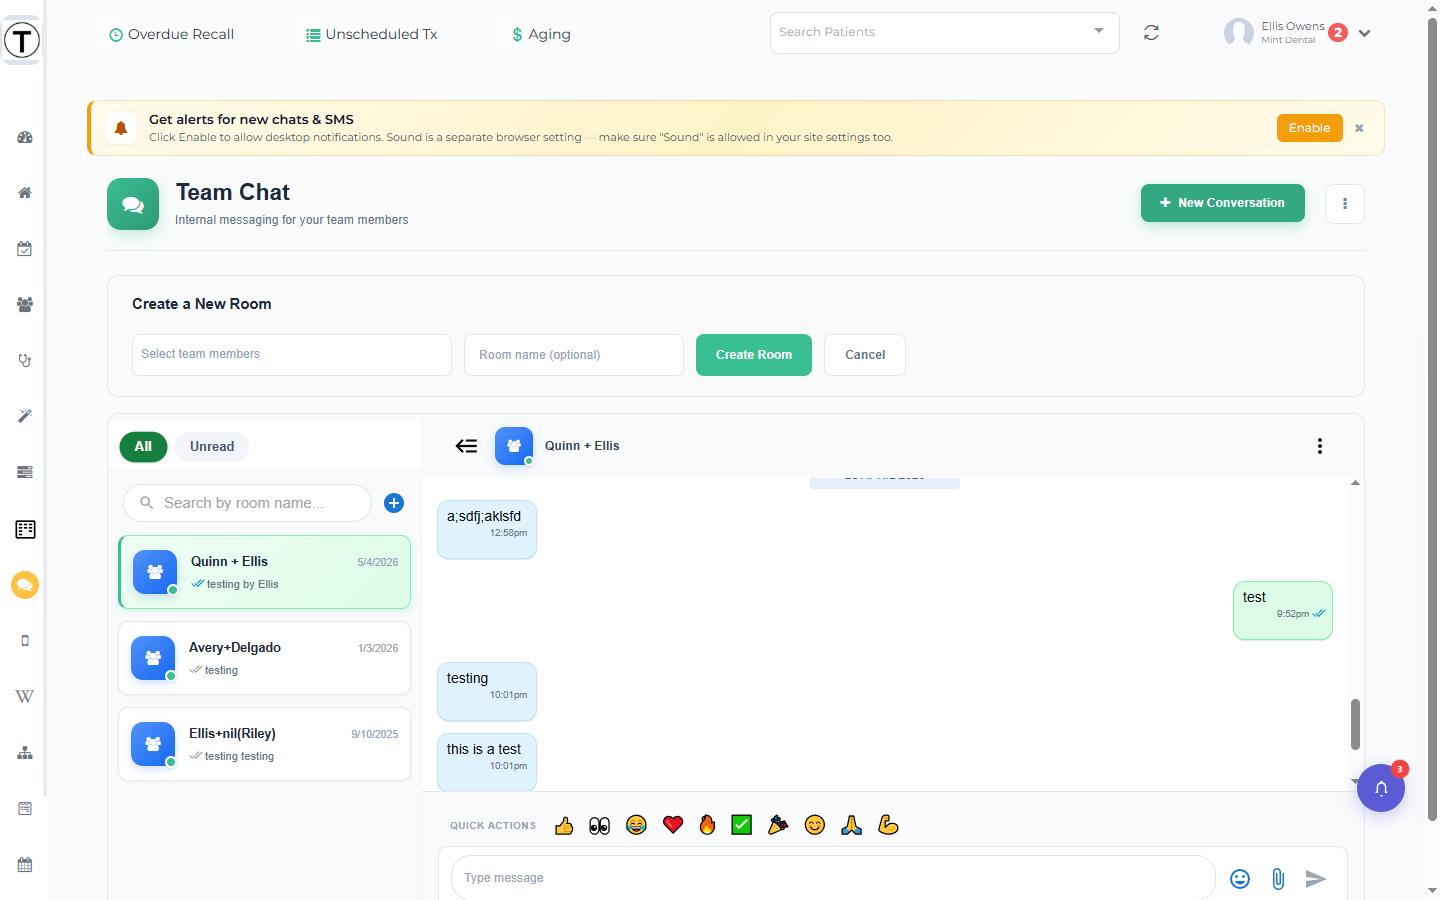
- Select New Conversation at the top right (or the blue + beside the room search).
- In the Create a New Room form, open the Select team members multiselect and choose who to include.
- Optionally enter a Room name (optional). With one other person and no name, the room behaves as a direct message and is auto-named after the participants.
- Select Create Room (or Cancel).
Manage a room
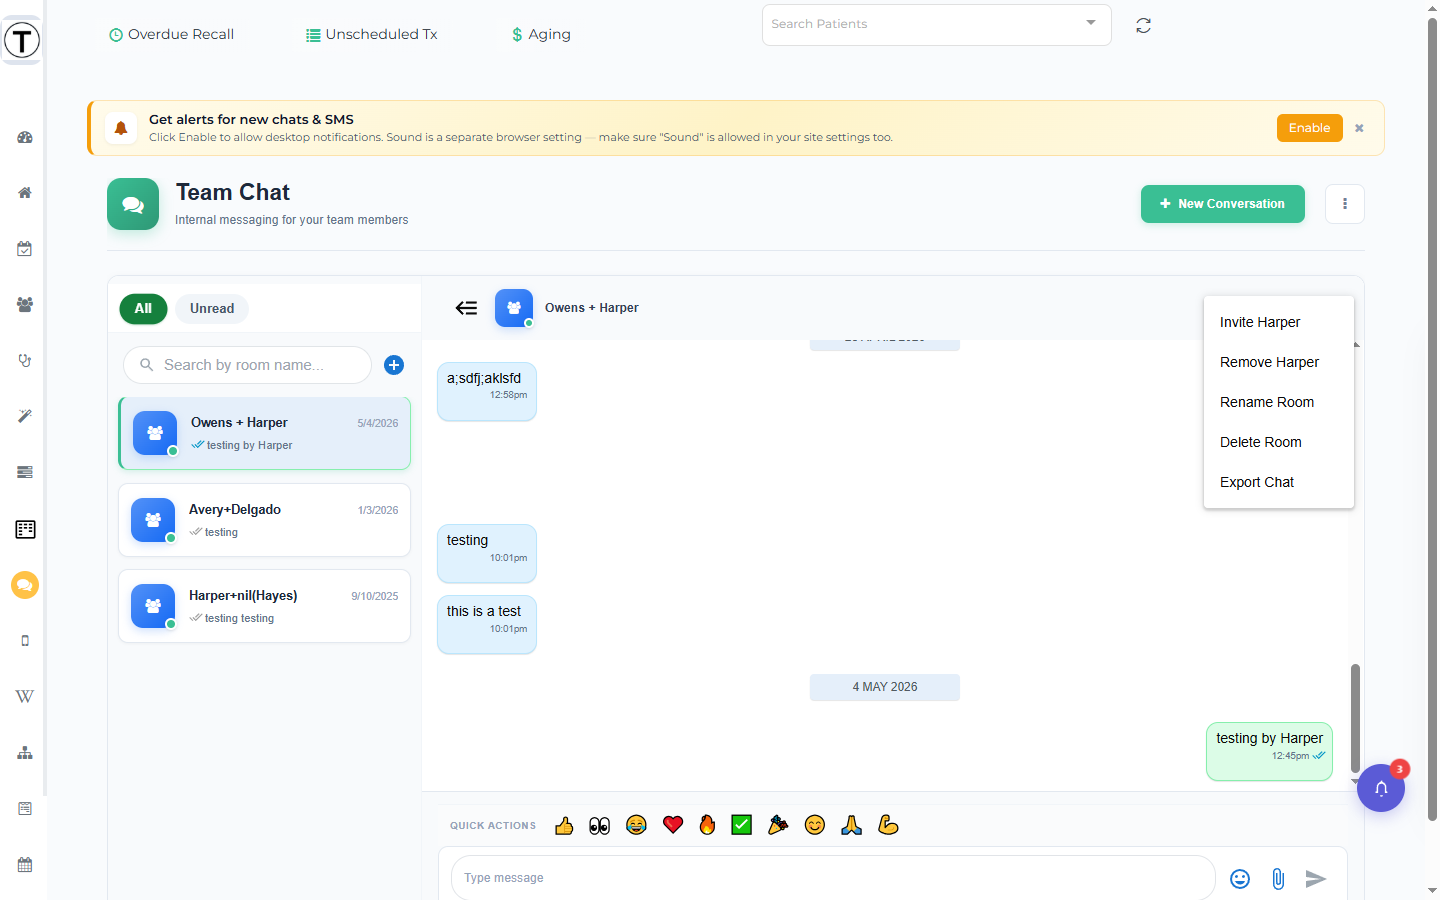
Section titled “Manage a room”Open a room and select the ⋮ menu on the room header. What you see depends on your role:
| Menu item | What it does | Who sees it |
|---|---|---|
| Invite User | Add a teammate to the room | Everyone |
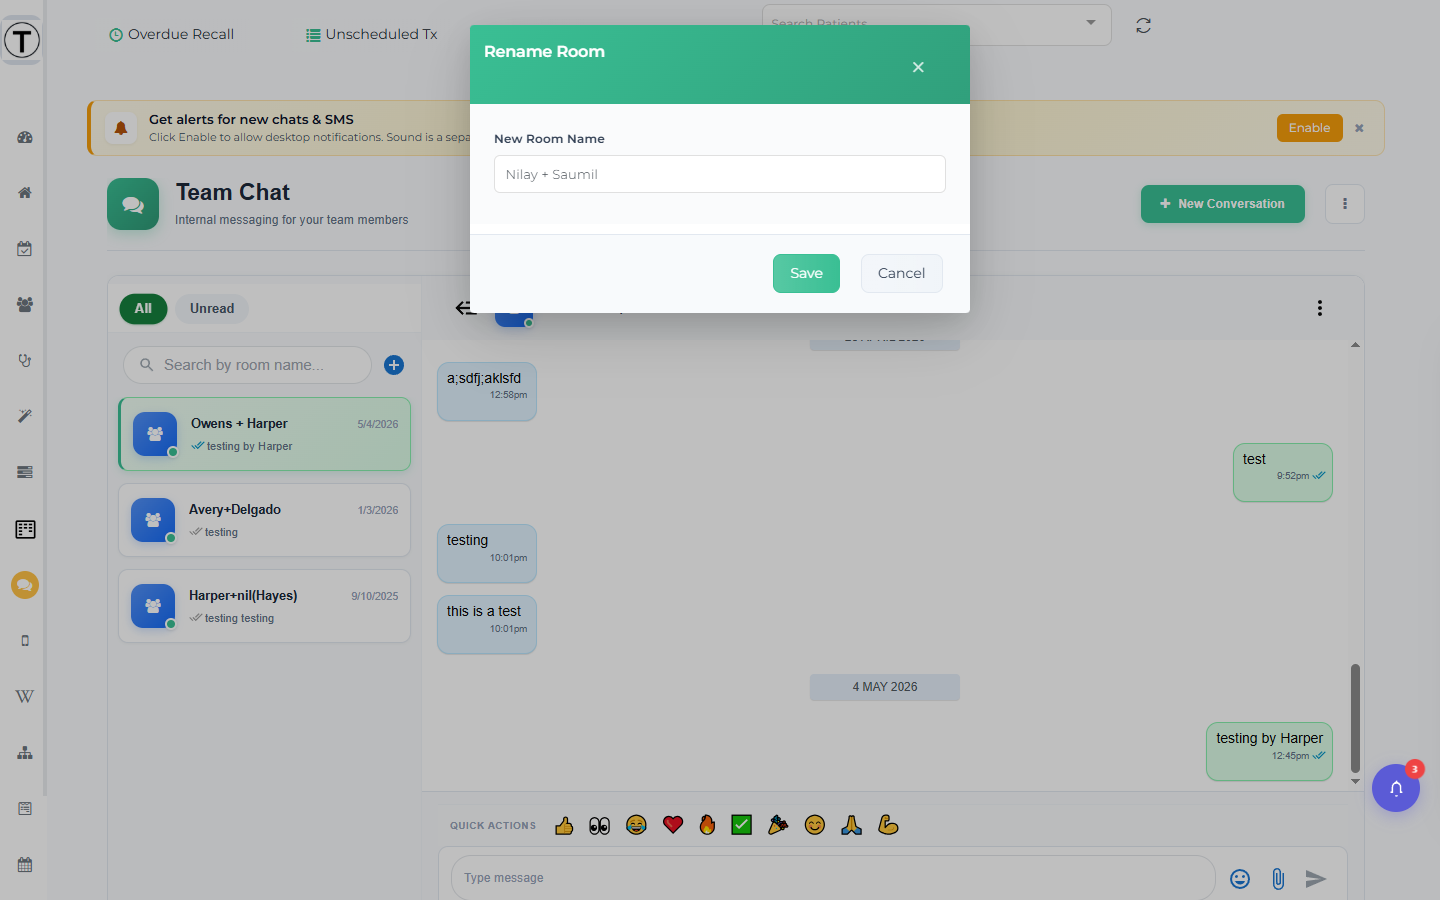
| Rename Room | Open the Rename Room modal to change the name | Everyone |
| Remove User | Take a teammate out of the room | Admin, Manager |
| Delete Room | Delete the room (asks Are you sure? and warns it can’t be restored) | Admin, Manager |
| Export Chat | Save the room as PDF/text — see Exporting a chat | Admin |
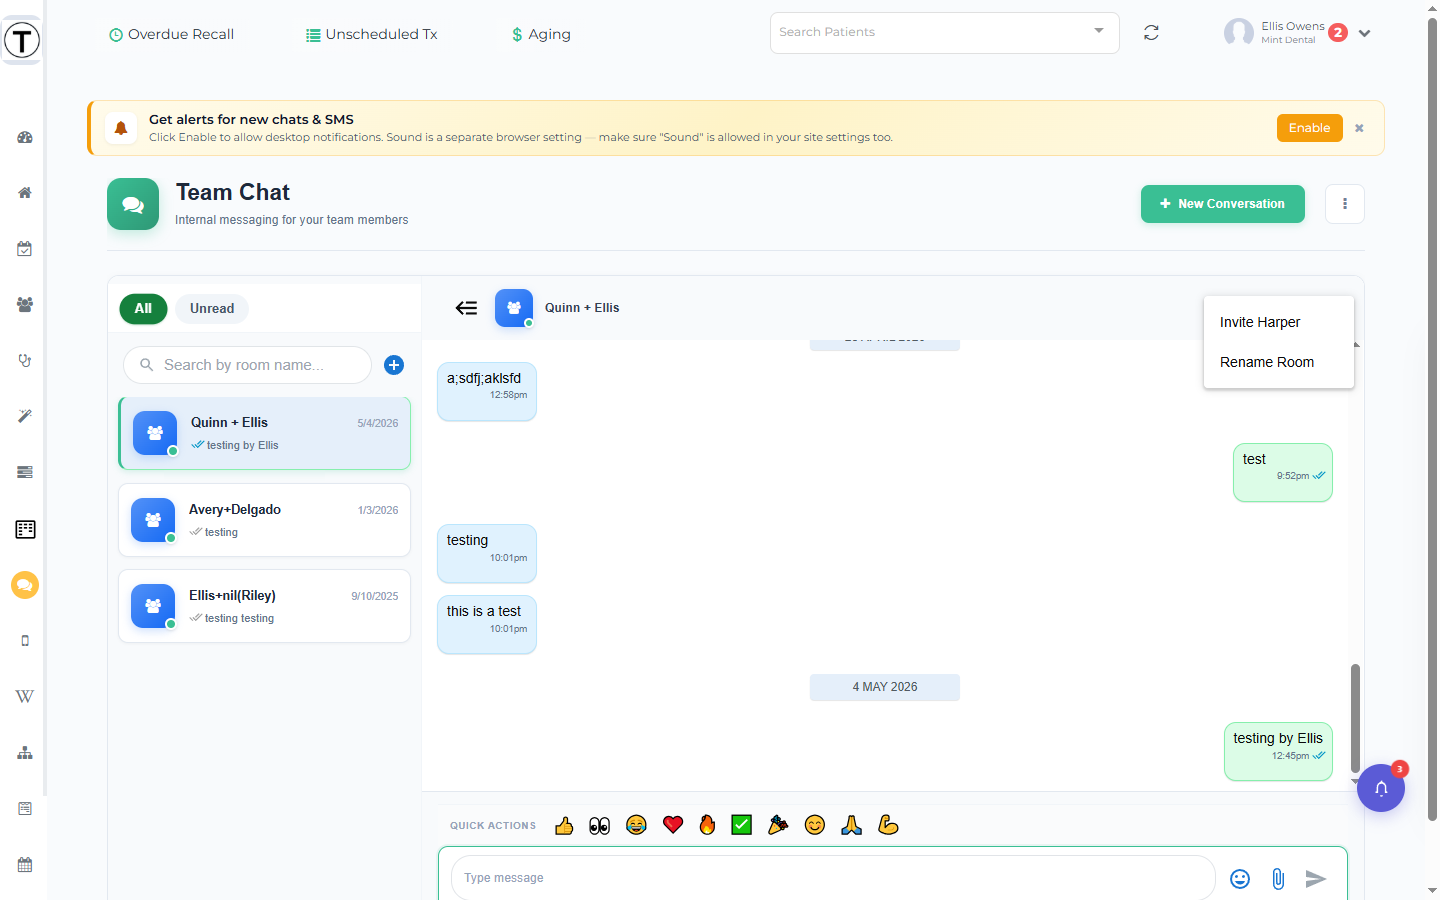
Employees and Outsourced staff see a shorter menu — only Invite User and Rename Room:
Selecting Rename Room opens a small modal:
Send messages, attachments, and images
Section titled “Send messages, attachments, and images”- Edit or delete your own messages after sending, and react to a message to acknowledge it without adding noise.
- Attachments: use the paperclip to upload. Size caps are 10 MB for images, 25 MB for documents, and 50 MB for video and audio.
- Paste to send: paste an image from your clipboard anywhere on the page and it’s sent to the open room.
- Image lightbox: images open full-size in a lightbox with previous/next navigation through the room’s images.
How long messages and files are kept
Section titled “How long messages and files are kept”The product footer states the retention policy: messages are retained for 1 year, and file attachments are retained for 90 days (max 10 MB images, 25 MB documents, 50 MB video/audio). If you need a longer-lived record, export the chat or turn a decision into a task.
Notifications
Section titled “Notifications”A new chat message lights up the green dot on the Chat icon in the rail and flips the browser tab title to 👀 Teamio - New Chat Message!, so a backgrounded tab is still noticeable. Sound and desktop alerts are set in ⋮ menu > Settings — see Message notifications.
Empty states you’ll see
Section titled “Empty states you’ll see”- You don’t have any chat rooms. Please click on the + icon above to create a new room first — no rooms yet.
- Please select a chat room on the left to start messaging — no room open.
- No messages yet. Start typing your message below — an empty room.
Chat vs the alternatives
Section titled “Chat vs the alternatives”- Decision in chat that needs action? Turn it into a task — chat scrolls away (and only keeps a year), tasks persist.
- Knowledge worth keeping (procedures, how-tos)? Put it in the Wiki, not a chat message.
- Need a lasting record? See Exporting a chat.
Related
Section titled “Related”- Exporting a chat
- Texting with patients — the patient-facing counterpart
- Message notifications