
Creating a campaign
The New Campaign wizard walks you through building and sending a campaign in four steps. It opens as a modal over the Campaigns page — you never leave the page.
Where: Sidebar > Campaigns > New Campaign
The wizard’s four steps are shown in a progress bar across the top: Details, Recipients, Content, Review. The footer carries Previous, Cancel, Save as Draft, and Next; on the last step Next becomes Create & Send, Schedule Campaign, or Save Draft depending on the schedule you choose.
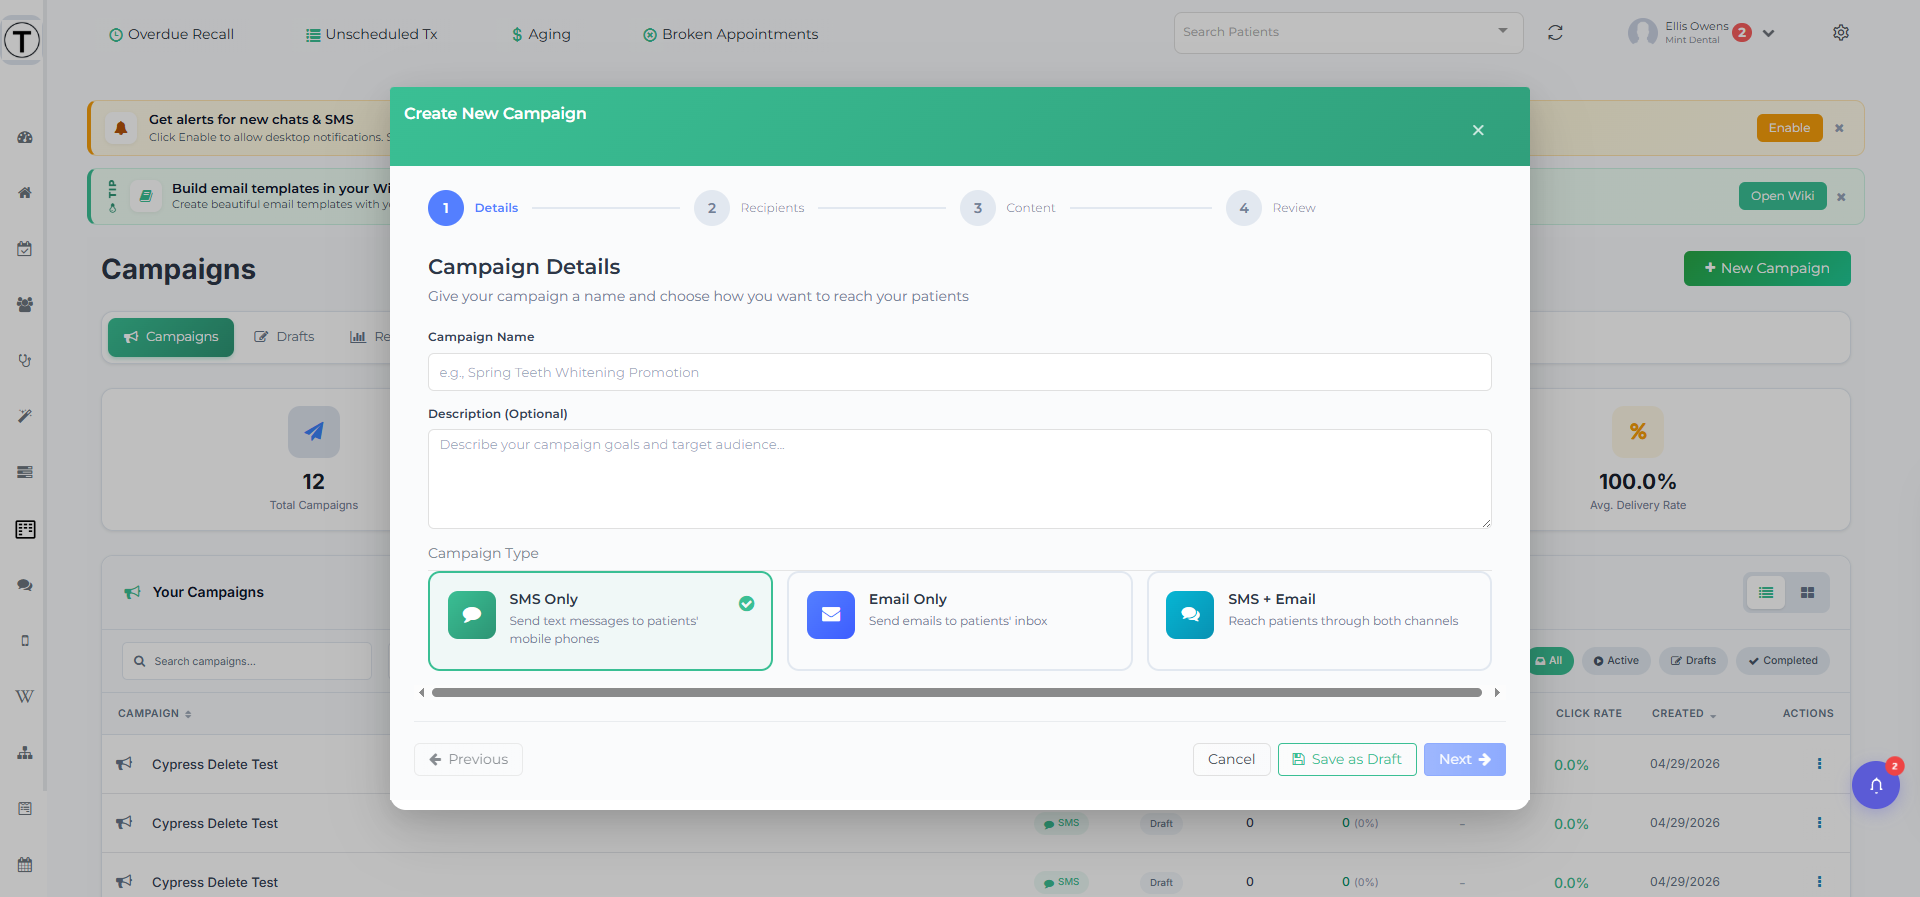
Step 1 — Campaign Details
Section titled “Step 1 — Campaign Details”-
Select New Campaign on the Campaigns page. The wizard opens on Campaign Details.
-
Enter a Campaign Name (required) — for example, “Spring Teeth Whitening Promotion”. A clear name makes Reports readable later.
-
Optionally add a Description (Optional).
-
Choose a Campaign Type — this is the channel, set with three cards:
- SMS Only — Send text messages to patients’ mobile phones. When SMS is enabled, the card shows your practice’s outgoing number in a green pill.
- Email Only — Send emails to patients’ inbox.
- SMS + Email — Reach patients through both channels.
A card you can’t use is locked with the exact reason: SMS is not enabled for your site, Email is not enabled for your site, or Requires both SMS and Email to be enabled for the combined card. See SMS campaigns and texting rules.
-
Select Next.
Step 2 — Recipients
Section titled “Step 2 — Recipients”Choose who receives the campaign. This step has the most impact on results, so it has its own article: Choosing recipients. In short, you pick one of four methods — Custom Filters, Scheduled Patients, Saved Patient List, or All Active Patients — preview the audience, then continue.
If some of the previewed patients are missing the contact info this channel needs, advancing opens the Some Recipients Won’t Receive This Campaign modal. Choose Go Back to revisit your list, or Update List & Continue to remove the unreachable patients from this send.
Step 3 — Compose your message
Section titled “Step 3 — Compose your message”What you see here depends on the Campaign Type.
SMS content
Section titled “SMS content”Type your message directly into the textarea. Above it:
- An Insert dropdown adds personalization variables — First Name (
{{patient_first_name}}), Last Name ({{patient_last_name}}), Practice Name ({{site_name}}), Practice Phone ({{site_officephone}}), and Practice Address ({{site_address1}}) — plus an emoji grid. - The header shows your practice’s outgoing number (“<Practice>‘s outgoing number: (xxx) xxx-xxxx”).
A live phone-mockup preview shows exactly what patients will see. A character counter tracks length: SMS sends in 160-character segments (message credits), so going over 160 splits the message and the preview shows split bubbles (1/2, 2/2) with a segment count (N messages). The composer also shows the campaign’s credit cost and any credits it would draw from your prepaid balance beyond your free monthly credits before you send — see Costs and delivery.
Below the box, a searchable list of wiki SMS templates appears (“Click a template below to prefill your message”). Selecting one drops its text into the box, where you can keep editing.
Email content
Section titled “Email content”An email campaign must use an email template — you can’t write one from scratch. The step shows Select an email template below and a searchable, paginated list of wiki email templates. Selecting one applies its content; the Subject Line then shows read-only (pulled from the template), and a Remove Template button lets you pick a different one. A collapsible Tracking options section holds a Click tracking switch.
Email and SMS templates are wiki pages tagged email-template or sms-template. See Building and using templates for how to create them.
When you’re done, select Next.
Step 4 — Schedule & Review
Section titled “Step 4 — Schedule & Review”Review the campaign and decide when it goes out. Under When to Send:
- Send Immediately — queue the campaign now. The footer button reads Create & Send.
- Schedule for Later — reveals a Date input and Hr : Min (00 / 15 / 30 / 45) AM/PM selects. The footer button reads Schedule Campaign.
- Save as Draft — store it without sending. The footer button reads Save Draft.
A Campaign Summary card recaps the name, type, audience size, and content.
Send a test first
Section titled “Send a test first”Select Send Test Message to check the real thing before any patient gets it. In the modal, enter a Test Email Address and/or Test Phone Number. The note explains how variables resolve in a test: site variables like {{site_name}} and {{site_officephone}} use your real practice info, while patient variables like {{patient_first_name}} and {{apt_date}} use sample data. Read the test on your own phone or inbox, every time.
Finish
Section titled “Finish”Select Create & Send (or Schedule Campaign / Save Draft). For an immediate send you’ll see Your campaign has been queued! — delivery happens in the background, and the campaign’s status updates live on the Campaigns page. A scheduled campaign waits at Scheduled until its send time; a draft lands in Drafts.
- Time sends for when patients respond — mid-morning weekdays tends to beat Friday at 5 pm.
- Keep one clear call to action, and keep SMS short to stay within a single segment.
- Watch a send land on its detail page, where real numbers fill in within hours.