
Saved lists — create and work focused patient lists
Where: Overdue Recall and Unscheduled Tx → check patients → Create New List
A saved list is a named snapshot of patients you want to keep working over several days. The same flow works identically on Overdue Recall and Unscheduled Tx. (Aging and Broken Appointments don’t have checkboxes, so they can’t be saved as lists.)
Create a list
Section titled “Create a list”-
Filter the list to the patients you want, then tick the checkbox on each one to include.
-
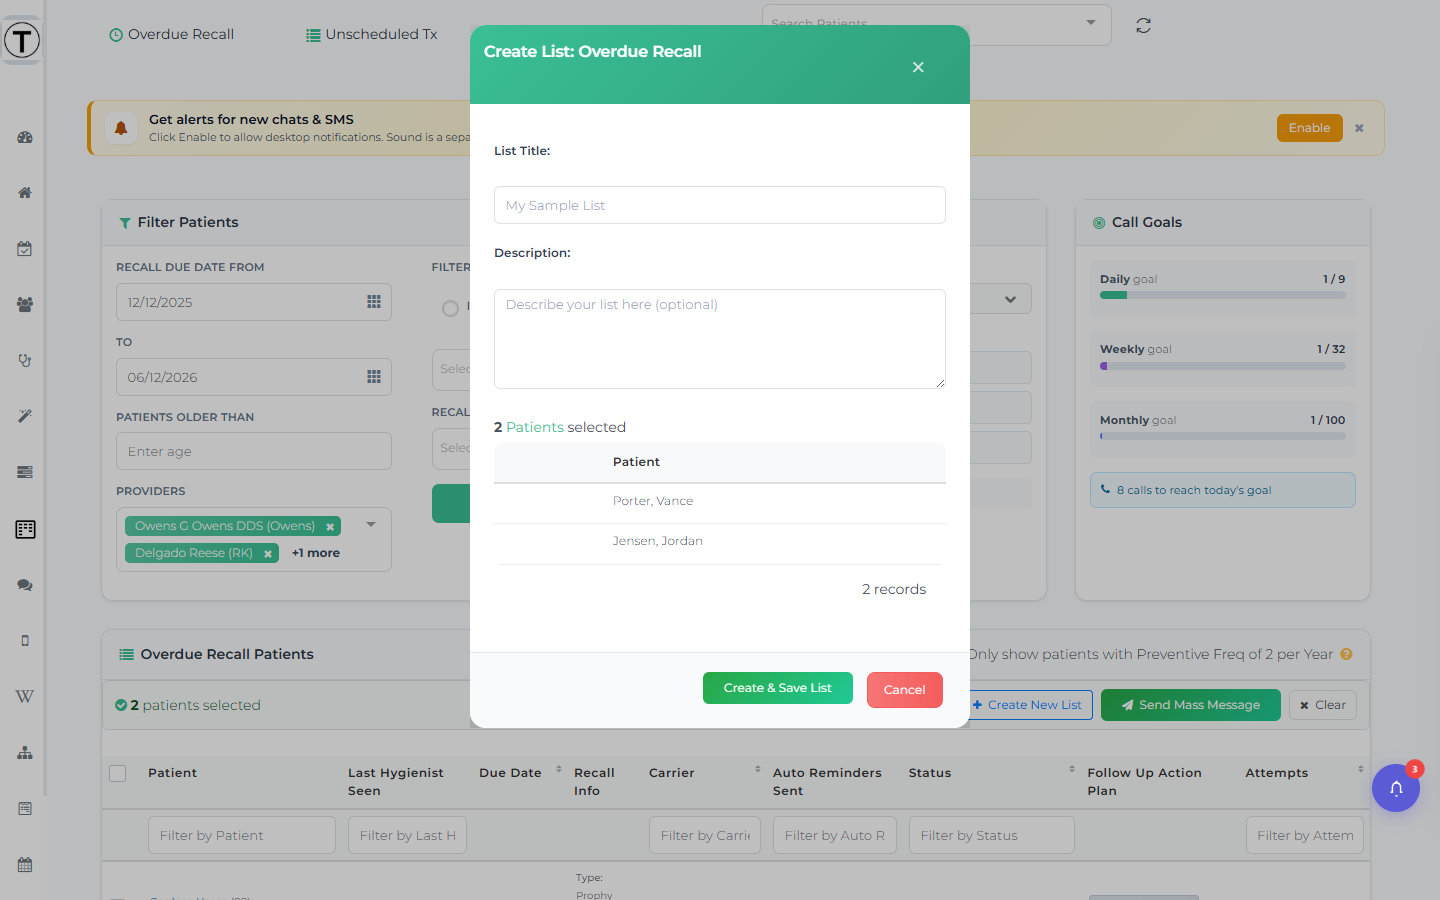
Select Create New List.
-
In the Create List modal, enter a List Title (and an optional Description) — that’s all it asks. There’s no assignee or goal here.
-
Select Create & Save List.
The list now appears in the Your Lists panel at the top of the page.
Add patients to an existing list
Section titled “Add patients to an existing list”Check the patients, then select Add to Existing List and pick the list. Use this to grow a list you’re already working rather than starting a new one.
Work a saved list
Section titled “Work a saved list”Open a list from the Your Lists dropdown (the panel also shows your three most recently created lists and a “N lists created” count; the first time, it shows a Create your first List empty state with starter ideas). The saved-list page (at /app/overdue-recall-list/{id} or /app/unscheduled-list/{id}) adds, above the familiar table:
- Follow-up Attempts and Outcome donut charts — progress at a glance.
- List info — description, who created it, and the patient count.
- A Default View link back to the full list.
Work each row exactly as you would on the main list — select a name to open the follow-up panel, log the attempt, set the next date.
Tidy up a list
Section titled “Tidy up a list”- Remove from list — the trash icon on a row drops just that patient.
- Delete List — removes the whole list (a confirmation modal protects you). Deleting a list doesn’t touch the patients or their follow-up history — only the grouping.