
Building a treatment plan
The plans you present come straight from Open Dental — Treatment Presenter reads each patient’s treatment-planned procedures. The Builder is where you tidy a plan for presentation: pick what shows, attach alternatives, and add a private note before you present or send.
Where: Sidebar → Tx Presenter → click a patient → Build
Find the patient on the dashboard
Section titled “Find the patient on the dashboard”The Treatment Presentations dashboard lists patients who have treatment-planned procedures, newest first.
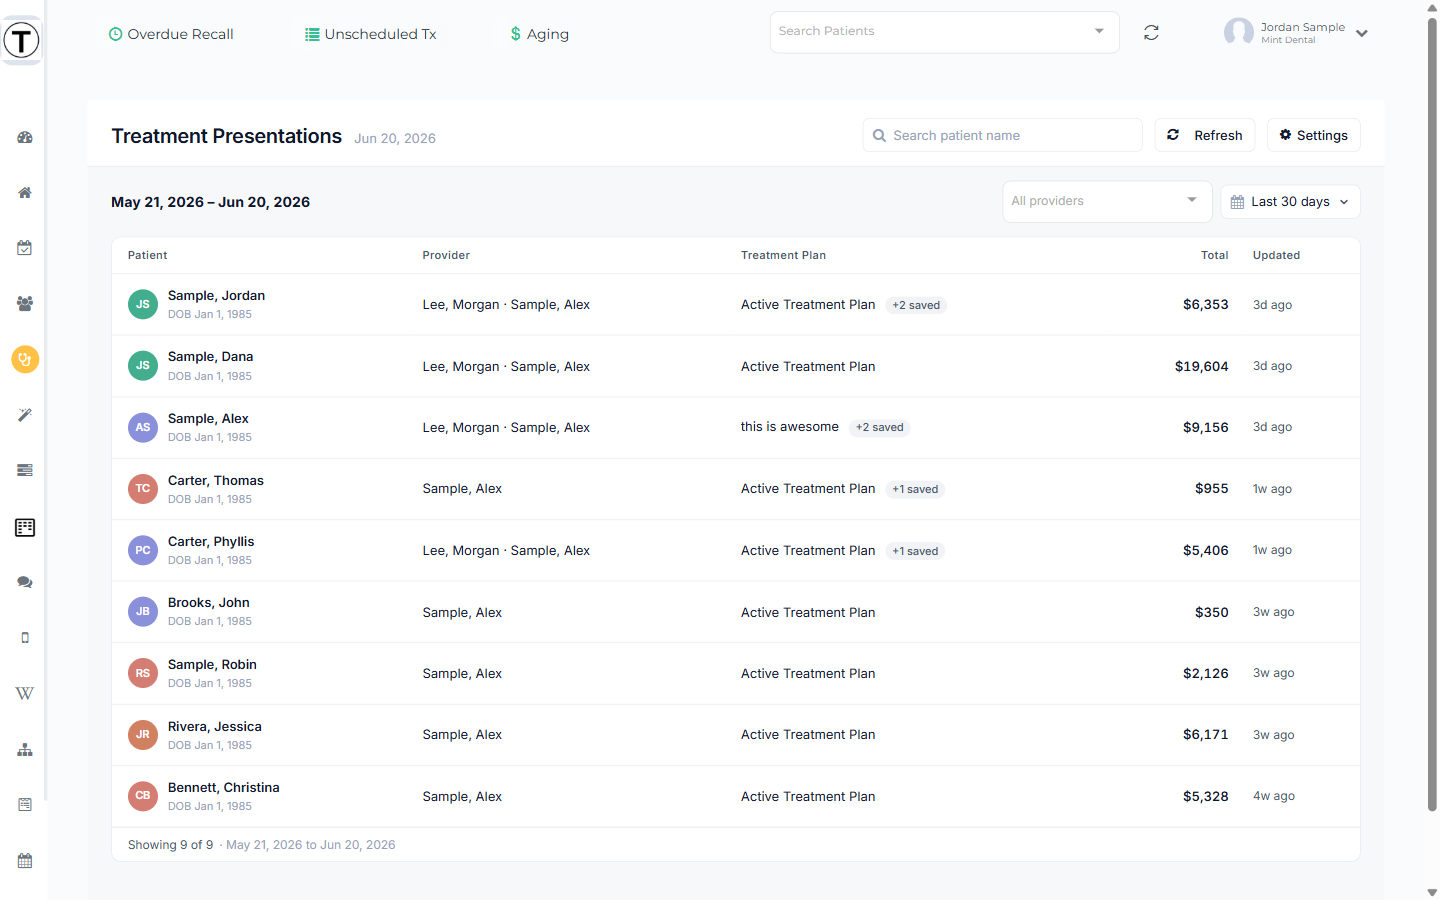
- Search by name — the list filters live as you type (no need to press Enter). Search looks across all of a patient’s plans, regardless of date.
- The date window (Last 7 / 30 / 60 / 90 days) controls who appears, based on when their plan was last touched in Open Dental. The default is 30 days; widen it to catch older plans.
- The Total column shows what your office can actually collect for that patient — see Plan views & pricing display for how that number is figured.
Click a patient to open the drawer on the right, then Build to open the Builder for the plan you want.
Inside the Builder
Section titled “Inside the Builder”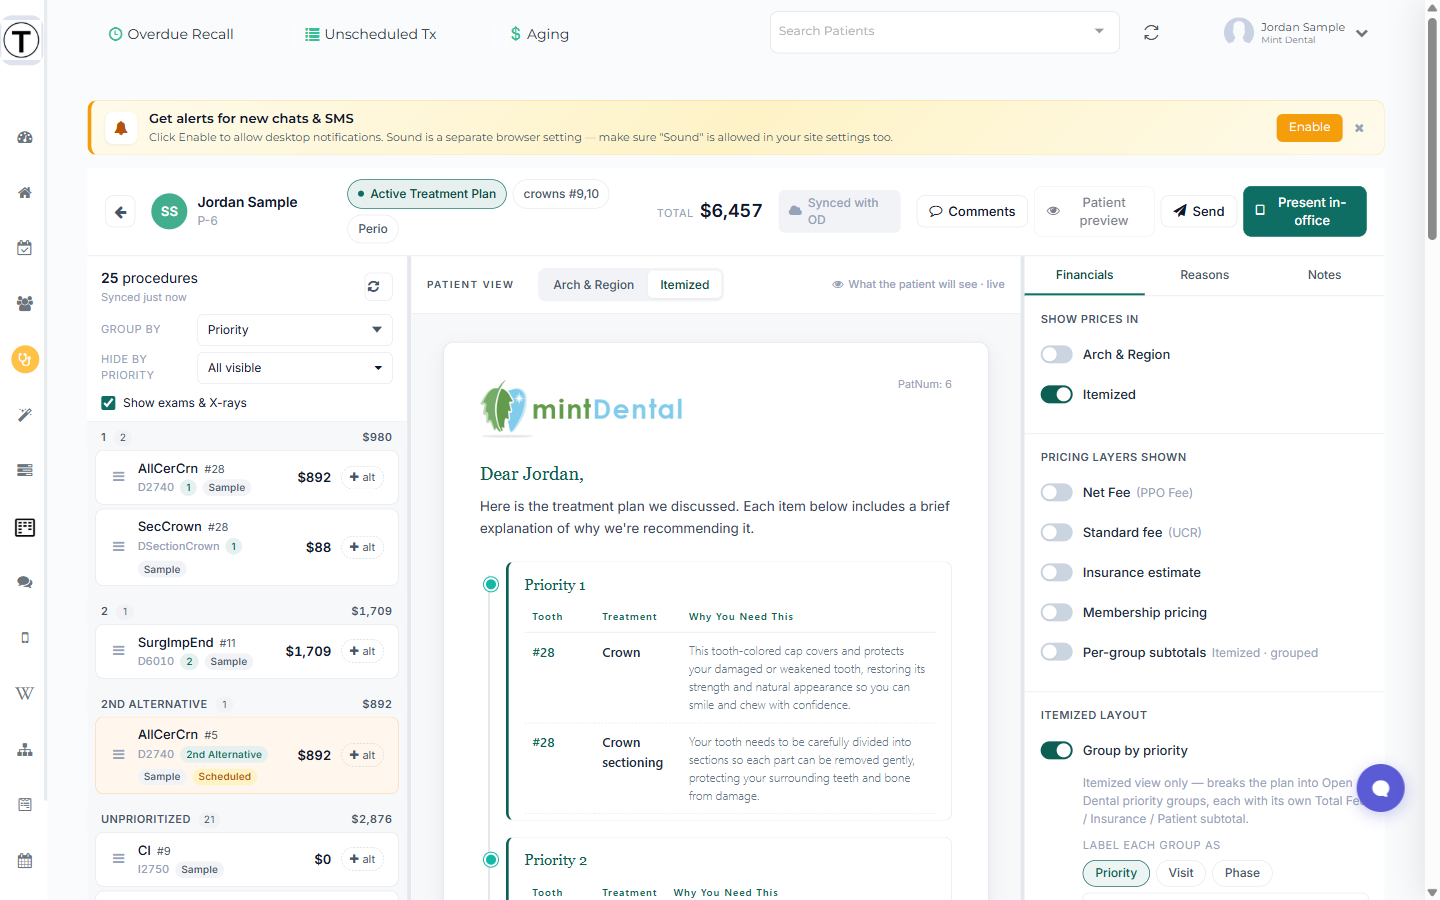
- The left panel lists the plan’s procedures. Each shows a plain-language label and reason (generated once per procedure code and reused), so the patient sees “Crown” and why, not “D2750.”
- The center shows the live plan exactly as the patient will see it — switch the view and pricing here too (see Plan views & pricing).
- The right panel holds the Financials tab (pricing and payment options) and a Notes tab.
Show or hide exams & X-rays
Section titled “Show or hide exams & X-rays”Use the Show exams & X-rays checkbox in the left panel to keep the presentation focused on treatment.
- Leave it on to show everything in the Open Dental plan.
- Turn it off to drop exams and X-rays from every view and the totals.
- Preventive items (cleanings, fluoride, sealants) always show.
This choice is saved for the patient and carries to chairside Present Mode and the at-home link.
Attach an alternative procedure
Section titled “Attach an alternative procedure”When you want to give the patient a choice (for example, Implant or Bridge), attach the second procedure as an alternative using the + alt control on the procedure’s row in the left panel.
Once an alternative is attached:
- It appears indented under the primary, with an “or” prefix, in the Arch & Region and Itemized views.
- Chairside, you can tap to swap the alternative in as the new primary in one motion — see Presenting a plan chairside.
- A procedure can have several alternatives; the patient can compare them all.
Add a private note
Section titled “Add a private note”The Notes tab (right panel) is a team-only note — for example, “patient is anxious about extractions.” It’s never shown to the patient, and it’s the same note you can edit chairside from the Present Mode controls, so it stays in sync wherever you are.