
Creating a form
A Teamio form is built from sections, and each section holds controls (the actual fields). This article covers the overall flow; the deep references are Form controls reference (every control) and Configuring a control (the settings every control shares).
Where: Sidebar > Forms > Create New Form
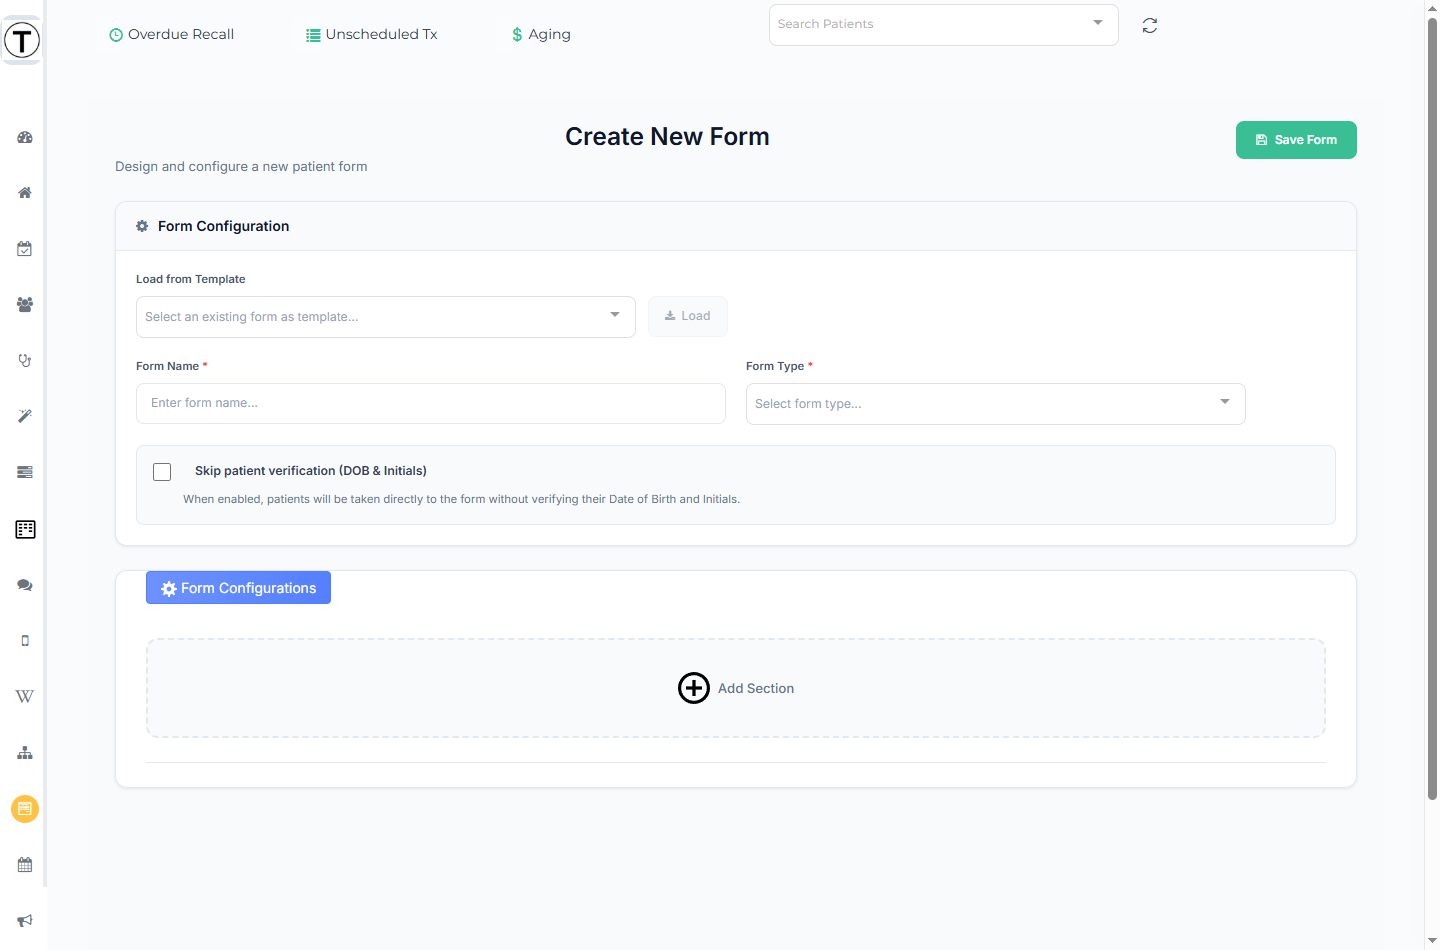
1. Form configuration
Section titled “1. Form configuration”The top Form Configuration card sets up the whole form:
-
Load from Template — optionally start from an existing form, then tweak. A huge time-saver: pick a similar form and edit it.
-
Form Name (required) — what staff and patients see.
-
Form Type (required) — the dropdown shows three values:
- NP_FORM — a new-patient intake form.
- MED_HX_UPDATE — a medical-history update form (drives the medical-history flows and the optional update reminders).
- OTHER — anything else (consents, authorizations, surveys).
The type governs which back-end flows run; how each answer reaches the chart is set per control. It locks after the first save — so choose deliberately.
-
Skip patient verification (DOB & Initials) — off by default. Leave it off for anything medical: patients must confirm their date of birth and initials before the form opens (see What patients see). Turn it on only for low-sensitivity forms where friction matters more than identity.
The page header has a Save Form button and the subtitle Design and configure a new patient form. There is no Preview button on the create page — per-language preview buttons only appear on the edit page, and only when extra languages are enabled.
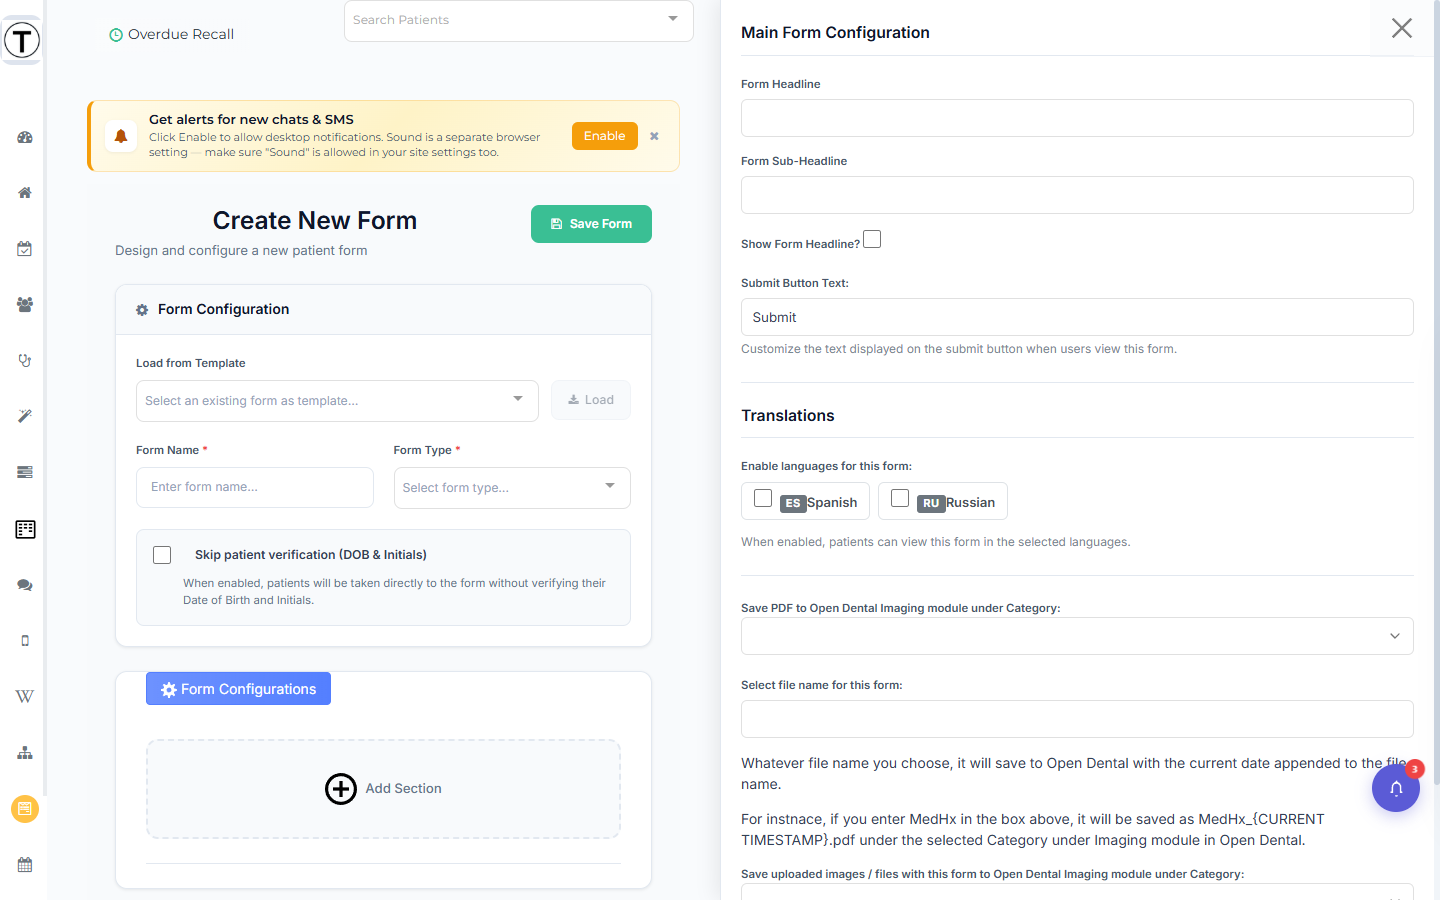
2. Open the Form Configurations sidebar
Section titled “2. Open the Form Configurations sidebar”Click Form Configurations at the top of the builder canvas to open the right-hand sidebar. This is where the form’s wrapper text and — most importantly — its PDF filing settings live:
- Form Headline, Form Sub-Headline, and Show Form Headline?
- Submit Button Text — rename the patient’s submit button (per-language variants too).
- Save PDF to Open Dental Imaging module under Category — the imaging category the signed/completed PDF files into.
- Select file name for this form — the PDF’s base name. The file saves as
<name>_<timestamp>.pdf. - Save uploaded images / files with this form to Open Dental Imaging module under Category — where patient uploads (insurance cards, IDs) file.
- Translations — enable extra languages here (see Multi-language forms).
3. Add a section
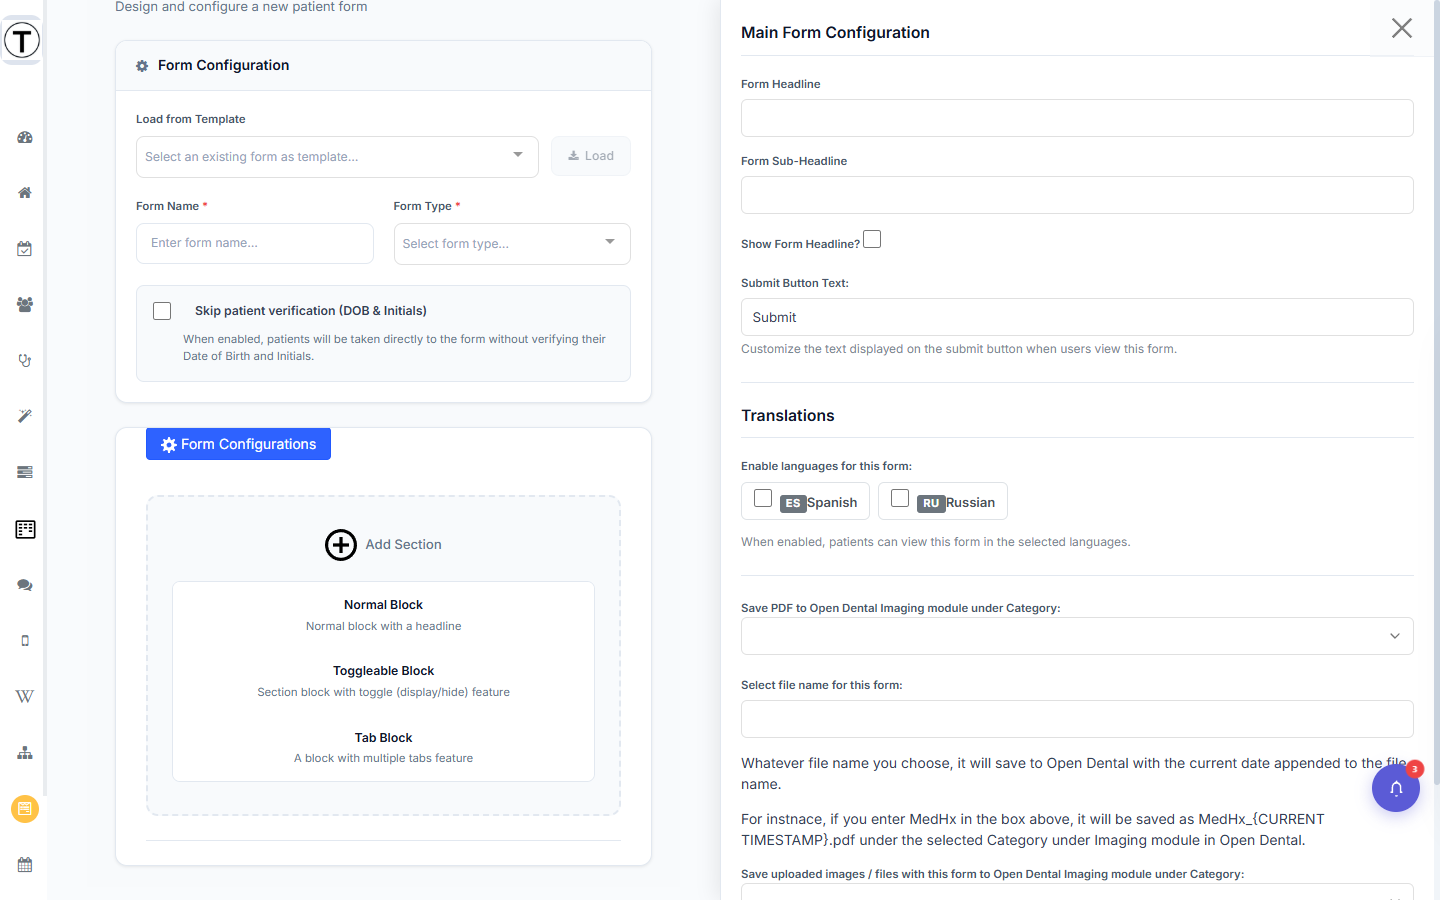
Section titled “3. Add a section”Scroll to the bottom of the canvas and click Add Section, then choose a block type:
- Normal Block — Normal block with a headline.
- Toggleable Block — Section block with toggle (display/hide) feature — good for optional groups patients can collapse.
- Tab Block — A block with multiple tabs feature — splits a long form into tabs. Tab Blocks have their own Add Tab button.
Each section has a headline and sub-headline (editable via its Configuration button). The section toolbar has Push Up / Push Down reorder buttons, Configuration, and Delete. Sections can carry their own visibility rules, and any section (or control) with conditions shows a Conditional eye badge in the builder.
Deleting a section with content asks you to confirm: This section contains row(s). Are you sure? Everything is gone and can’t be recovered after deleted.
4. Add controls
Section titled “4. Add controls”Inside a section, click Add Control to open the Add Control to your Section sidebar — 20 control types, each with a name and one-line description. Pick one and it drops into the section (defaulting to one-third width). See the controls reference.
Hover any control to reveal its toolbar:
- Re-position / Drag (yellow handle) — drag to reorder within the section, or into another section.
- Control Configuration (blue gear) — open the Configuration panel.
- Delete Control (red trash) — remove it.
Laying out fields side by side: each control’s Container Size (a 12-column grid) controls its width — set two fields to COL6, or three to COL4, to put them on one row. See Configuring a control > Styling.
5. Save
Section titled “5. Save”Click Save Form. It appears in your forms list, ready to share.
Tips and common questions
Section titled “Tips and common questions”- Start from the patient’s point of view — every extra field costs completion. Ask only what the office will actually use.
- Signature fields turn a form into a consent document — the completed PDF files into Open Dental imaging (details).
- Map answers to the chart — set a control’s Save to Open Dental Field so the answer posts back automatically (details).
- Need Spanish? Enable languages in Form Configurations > Translations and Teamio auto-translates on save — see Multi-language forms.
- Form Type is permanent — if you picked wrong, create a new form rather than trying to convert.